Professional time-lapse photographer Dario Cali - AKA Daduxio - will guide you to the best workflow for creating a time-lapse in motion, the so called hyper-lapse. Please support the author by visiting his website and sharing this article!
The author
We know Dario Calì because he's the italian time-lapser, friend of TLN, who emigrated to Australia in search of new ideas and professional adventures.
In its first month of stay in Australia he took all the sequences of his first hyper-lapse on Australian soil: The city of Brisbane in a hyperlapse Made in Italy, which we now propose below if you missed it.
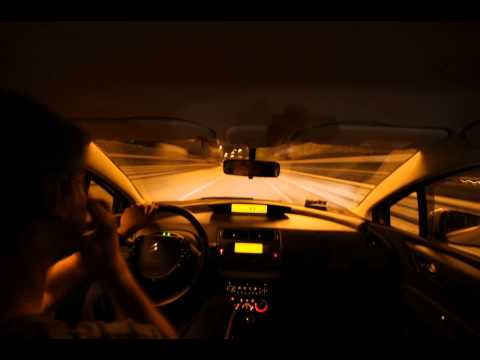
Another fantastic work of him is Dark Skies, which you definitely want to watch to better understand what Dario will be teaching us in this post:
What is a hyperlapse?
In short: with hyper-lapse we indicate that type of time-lapse that are realised in motion in a broad physical space, without the support of a motorised slider/dolly, that would generally cover distances between 50cm and 200cm.
Imagine then a time-lapse where, during the pause between a shot and the other, every time the camera is moved a few inches.
How to create a Hyper-lapse?
First we must distinguish between the different types of hyperlapse that I decided to split into two categories: "hyperlapse with pan" and "hyperlapse with fixed point".
I found Magic Lantern a great ally for the realization of hyperlapse on my Canon 5D Mark II ... Some of these options are interchangeable, it may be that someone will get along better with other settings, here I show you how I work myself.
How to set the camera during a hyper-lapse?
I'll start with those that are the settings I used to set the camera. The main thing I've done is set the menu "OVERLAY" ML Magic Zoom:
- Trigger mode: Always ON
- Size: Large
- Position: Focus Box
- Magnification: 3:1
- Focus Confirm: Splitscreen
The other setting that I enabled, on the menu overlay is "Spotmeter":
- Unit: Percent
- Position: Focus Box
Also from ML in the "Expo", LV display option, I set "Photo, ExpSim".

From the regular menu I disabled the preview, this is to have more time to find between one shot and the other point in common if we are creating a hyperlapse with fixed point.
For this guide I will use as a reference to the scenes video that I made a short time ago, Brisbane Hyperlapse 2013:
Method 1 - Hyperlapse with Fixed Point
I decided to call this type of hyperlapse in this way because basically what you have to do is try to have a fixed constant that does not change between frames: this can be anywhere in the scene, in the center, bottom left, basically it needs to be consistent and do not fall off the frame.
Activate the live view in the camera and then try to find that point on which your going to rotate around to create the shot. Using the magic zoom of ML and aligning the square of spotmeter with our point of reference and 50% of the stabilization is made already :)
I saw that the minimum interval between one shot and the other using this system is 4-5 seconds, this is because in this way we are able to re-center the square of spotmeter with our reference point.
How much do you need to move during a hyper-lapse?
Well, ignoring that it depends very much on the result we want to achieve, I follow this reasoning: the more the reference point is far away (like a palace on the other side of a river), the quicker we can move.
Conversely, if we turn around a statue that is 3 feet away from us we will need to decrease the distance between one shot and the other to be able to have a better stabilization. In the sequences at 1:21 and 1:31 I moved about a meter for every shot.
What lens to I need to use for an hyperlapse?
I came to the conclusion that depends on the type of hyperlapse that we are taking and how we move from one step to another.
As for the hyperlapse with fixed point we can use EVEN wide-angle lenses but we should be careful to reduce the travel distance to not to have an excessive difference of distortion between the 2 shots.
Same thing goes for telephoto lenses (let's say from 70mm up), the longer the focal length is, the less you should be moving between two frames. Let's say that I find myself fine with a 24mm.
Do I Need a tripod to create a hyperlapse?
I have not spoken yet of a tripod and you know why? Because most of the time it's not! Using the magic zoom of ML with one hand a bit firm is not necessary!
The only reason why I continue to use it is to not have all the weight of the SLR camera and lens on the hand, and to simplify the work at warp stabilizer (to be discussed later).
I'm not saying not to use a tripod to achieve hyperlapse, I'm just saying that in those places where it is not allowed to use a tripod or monopod that is, we can always succeed in our attempt using the functions of ML. For example the sequence at 1:28 was made without a tripod ... The choice is yours!
Method 2 - How do you create a hyperlapse with Pan?
Here the tripod is needed :)
What we need to do is try to always have the camera in the same position.A thing that helps a lot (for the few HL that I did that way) with a digital level, what I did was to download one of dozens of free apps that include a gyroscope, I placed the phone on the receiver flash and tried to keep the whole thing "leveled".
What definitely can help you is the use of a trolley and position the camera on it, a skateboard, a shopping cart (as long as the front wheels are locked), a stroller ...
In short, these accessories can be very helpful because they avoid to having to lift and reposition the tripod.
I don't feel confortable to say which lens to use in this case because I didn't have enough time to play with technique properly but a normal lens should work just fine!
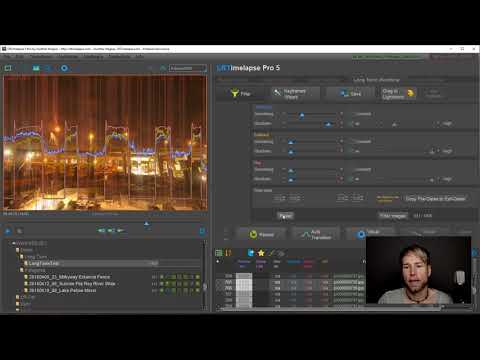
Post Production of a hyper-lapse with pan
I quickly summarise what is my workflow for a hyperlapse:
- Open the sequence in Lightroom: edit and save the raw metadata.
- (TLTools): I use this program, with which I am finding very well, to remove flickering when I shot in aperture priority.
- I open After Effects and apply Warp Stabilizer: the settings here vary a lot from how the sequence was made. As some forum members suggest, set detailed analysis smoothness to 80 % and then I personally select the option "crop less smooth more" to 70-80%. The rest of it is by default unless you have special needs ... I suggest to "fiddle" with the parameters to better understand the pros and cons.
- Render the sequence as a sequence of jpeg
In case that the stabilisation does not satisfy me, I analyse again my jpeg sequence with the warp stabiliser, and I do so as long as I do not have a product that satisfies me.
I remain available for any questions, comments or concerns. Please leave a comment and I'll followup at the earliest!
Hyper-Lapse Video Tutorial
As this post started to be a bit old, I wanted to add new contents to it, including an extra video tutorial done by third author, to complete the already great tutorial written by our friend Daduxio: