In this super thorough article Harbortronics' Chief Engiwebneer Mark Roberts explains the differences in available long term time-lapse equipments and why you might pick one type of system over another.
Let's get started!
OK, I need a Long Term Time-Lapse System: and now?
You have been tasked with taking pictures of a project that is going to take months or years to complete. You plan to use the individual pictures to examine details, and want to make a set of video clips that show the changes over time.
This article is intended to help you understand the differences in available long term time-lapse equipment, and why you might pick one type of system over another. There is a lot to know!
I have been developing time-lapse equipment for 19 years, and can talk endlessly about the arcane issues associated with time-lapse in challenging environments. Our equipment at Harbortronics is perfectly suited for many projects, but there are other companies with better solutions for others. Bear with me as I lead you through a host of details and make some suggestions that may help you select a system that is optimum for your application. Here is what we’ll discuss...
 Cyclapse watching over construction of the new Maota Fono in Samoa
- Length of a project
- Two big decisions
- What’s available
- Recommendations
- Checklist
Introduction to Long Term Time-Lapse
Start with the basics… what is Time-Lapse?
Time-Lapse photography is simply taking pictures from one point-of-view over time. These pictures are used to create a video clip that quickly shows the changes over time (learn more about how to create a time-lapse technique here).
Adding the term “Long term” is simply an acknowledgment that there are some additional considerations when the project lasts longer than a few hours.
Video vs Digital Stills
Video generates images one after another, at high speed. Video is great for events that happen at ‘normal’ speed.
A digital stills camera can be used with an intervalometer to take pictures at a rate appropriate to the changes in the scene, and with greatly increased resolution and image quality.
Those digital stills can then be sequenced into a video to rapidly show those slow changes. You may not realize it, but even the lowest cost SLR cameras have image resolution and quality that greatly exceed 4K video.
Multiple points-of-view
If you watch a few time-lapse videos, it quickly becomes obvious that watching a scene from the same perspective for minutes at a time is tedious. Our attention is better held by switching from one point-of-view to another. Television advertising takes this to the extreme, changing perspective every second or two! While this sort of problem is clear, most time-lapse projects don’t take this into consideration. Keep this in mind when thinking about your project. Visit the site often to take beauty shots and additional footage from unique angles.
Some projects might physically re-position a single camera at different times, but this takes a lot of planning and effort. This technique is called Hyperlapse. In order to get multiple points-of-view, it generally makes more sense on long term projects to have multiple cameras capturing the scene from different perspectives for the whole duration. During the final edit, the perspective can be changed as often as needed to make the video interesting.
How long is Long-Term, and why does it matter?
Taking pictures using the camera’s internal battery and it’s built-in intervalometer is easy, but is it sufficient? Not for long term projects… here are the problems you will encounter!
More than a day: Power
 The camera’s internal battery are insufficient for anything more than a day or so, so you have to supply power to the camera. Many cameras can accept a dummy battery, or have a plug on the side of the camera.
In most systems there will be a good sized battery pack used to power all of the electronics (including camera) via a DC/DC converter, and AC mains or Solar power is used to keep that battery pack charged.
More than a week: Environment
 If you are indoors, great, no problem… well, even indoor construction can be dusty! The majority of long term projects are outdoors, watching a change in the environment or a construction project. If the camera is going to sit outdoors for more than a week or so, you should factor in weather protection.
The housing will need to prevent dust from getting inside, but the more difficult issue is moisture. If your camera is in Svalbard on the coastline of Bear Island taking pictures of a bird colony, you will need to keep salt and moisture from accumulating inside the housing, slowly destroying everything.
 Close the lid, cameras cannot swim!
Some systems use housings that are vented to keep moisture from accumulating, but don’t block moisture (and salt) from entering. Some of these have low efficiency electronics and actually require fans for cooling or moisture control! Other housings are sealed against water spray, but not guaranteed water-tight. If there is a housing that is nearly watertight but has a leaky seal, it can act as a moisture pump, and will actually accumulate standing water. Ahh, so many stories!
The best of all housings is one that is completely watertight, and uses highly efficient electronics to eliminate internal heating. This is the approach taken at Harbortronics. Just make sure to latch the door or lid :)
More than a month: Storage
 Memory cards are available up to about 512GB. This is enough for 200 high quality pictures per day for a year! If your project is in a place that’s impractical to access, and you have faith in the reliability of the system, you could certainly leave it in place for long durations.
More likely, you will periodically access the camera to extract the image files to reduce the risk of complete project failure. Generally a 32 GB camera memory is fine for most projects.
A typical intervalometer will take pictures at a constant rate, 24 hours a day. In long term projects, you’ll quite likely want to take pictures only during daylight hours, working hours, or during the work week. The system electronics will likely include an intervalometer that can address these needs. Limiting the pictures to the ‘interesting’ times can reduce memory requirements, but more importantly it will reduce the need to discard photos during video edit. On the other hand, you may use the system to take images at different rates at different times of day.
How do you ‘get’ those pictures from the camera? Swapping memory cards, USB download, USB thumb drive, or transmit images to the internet?
More than a year: Reliability
A time-lapse camera system has a lot of pieces required to support the camera over a long period of time. While all manufacturers honestly strive to produce reliable equipment, there is a compromise in all designs… complexity vs reliability.
Harbortronics has a favorite customer report of a very long term placement, on an open-pit mine in Peru. They have 6 systems which have operated continuously for over 6 years (so far), with only about 2 weeks of downtime on one of their systems. That’s an ‘up-time’ of 99.9%. Will your own system achieve this reliability? Unlikely... you do need to understand that your system will require some attention over time.
 You may experience no problems with your system during your short term tests before deployment, which is of course encouraging. Once you have a set of electronics and optics sitting in the weather for years, any flaws in the design or construction will eventually arise! This isn’t intended to scare you, just to let you know that issues sometimes happen, and not to be shocked.
Long Term time-lapses: Product Differentiation
The Time-Lapse equipment market comprises multiple overlapping segments, but the design of the camera systems are most heavily influenced by two factors: Sensor Size, and Image Access.

Sensor Size does matter!
Time-lapse camera systems generally use one of two sensor sizes. We could be polite and say smaller and larger, but realistically it’s better described as Tiny and Large!

- Tiny (1/2.3”)
- Large (APS)
There is a factor of 11x the area going from a Tiny sensor to a Large. This is a HUGE difference!
Unique in the industry, the Harbortronics Cyclapse housing is able to use the typical APS-SLR cameras, Full-Frame SLR cameras, and even the Pentax 645Z medium format camera. These cameras have sensors that have 30x and 50x the area of a Tiny sensor!
OK, I get it, there are different sensor sizes. So what? I’m not a photography expert… why do I care about the sensor size? Great question! Let’s take some time to really understand the trade-offs.
- Image Quality vs Cost
- Lens Choice
- Digital Zoom-ability
- Focus: Fixed/Auto/Manual
- Lens Size: Dust/Splatter
- Housing Size
- Shutter Mechanism
Image Quality vs Cost
When you see a professional or serious amateur photographer, what type of camera are they using? The vast majority use SLR cameras, as they create high resolution and high quality images. Some may use mirrorless cameras, and studio photographers may even use medium or large format, but SLRs are the tool of choice for all serious work. Tiny sensors have spawned convenient ‘pocket-able’ and ‘action’ cameras, but they simply don’t produce photos with quality comparable to the larger cameras.
Tiny sensors use tiny lenses, and that combination keeps the cost to the manufacturer very low (higher profits). Sensor pixels have roughly the same amount of noise regardless of their size. Large sensors use larger area lenses, which applies more more light to the pixel, improving the ‘signal to noise ratio’, meaning better dynamic range and color accuracy. A tiny sensor can use lots of microscopic pixels to achieve high resolution, but this results in noisy images. Larger pixels can be used, but a greatly reduced number of them can fit on a tiny sensor, resulting in low resolution. The sensor manufacturer can optimize a tiny sensor for dynamic range or for resolution, but not both. Let’s be honest, cameras using tiny sensors are optimized for size and cost, and the quality of the image is secondary.
Cameras with large area sensors are designed to optimize image quality over size and cost. Pixels are larger in area, and the overall sensor is much larger in order to accommodate higher resolution. The large sensors produce simultaneously high quality and high resolution images.
If we look back in time more than 15 years, there were no large sensors available. The tiny sensors that were available produced images that were initially terrible, but sensor manufacturers have been making progress ever since. While the large area sensors have undeniably better image quality, many cameras with tiny sensors will produce images that are quite nice, when illuminated well and examined not-too-closely. The lighting constantly changes outdoors, and zooming into time-lapse photos is very useful, so you can’t ignore the image quality differences.
Lens Choice
The lenses that come with tiny sensor cameras are fixed (no zoom, non-adjustable iris), which again reduces cost. Some cameras may have a horizontal angle of view of 60 degrees, others may be 120 degrees or wider. Tiny sensor systems offer no choice of focal length, depth of field, or focus distance.
Large area sensor cameras normally come with zoom lenses, and if you have a particular photographic aspect you want to optimize, lens choices abound! You can optimize the optics to suit your site.
Every budding photographer is taught to fill the frame with the scene! It is re-enforced over and over again, and the same principal applies to time-lapse. With optical zoom lenses (large sensors), you can do this independent of camera placement. Zoom lenses allow you to place the camera at the best mounting location, and adjust to fill the frame. With a fixed lens, if you want to fill the frame, the fixed lens dictates the optimum distance. On most projects, it’s hard enough to find ANY good spot to place a camera, and you rarely have the choice of placing the camera to suit a fixed lens!
You’ll want to locate the camera such that it doesn’t interfere with the scene, and so that people on the scene don’t interfere with the camera! Vandalism and theft limit the choice of placement of cameras on construction sites. Many workers hate the thought of being watched, and may unplug the camera, or spray-paint the window. You’ll want to keep the camera out of harms way. On the other hand, locating it at a distance means that a wide angle lens won’t yield usable images.
Well, how do I know what lens I need? First you need to sketch the site, estimating where the cameras will be placed, and the coverage from each. From the drawing, use a protractor to determine the angle of view for each camera. In the example below, the angles range from 27 to 59 degrees. A fixed 60 degree lens would be fine for two of the cameras, but the camera at a distance really needs a longer lens. A typical APS SLR camera comes with an 18-55mm ‘kit’ lens, which has a variable angle of view from 23 to 63 degrees… a perfect match for all 3 camera locations!

As long as the angle of view is wide enough to capture the scene, you can always zoom in digitally, right? Maybe. If you start out with an image quality that is just barely adequate, the zoomed-in image may not be useful. Let’s tackle this subject next.
Digital Zoom-ability
While you set up the camera to take images that cover the whole scene, you will absolutely want to ‘zoom’ in to highlight the details! You can also pan around the scene while zoomed in, to simulate camera motion. We all find that watching a movie with some motion is much more captivating than watching a wider, static view. This technique is used in every good time-lapse movie to make best use of a static camera position, and shouldn’t be ignored!
This Pan & Zoom In-Frame technique can be applied to any high resolution image, but when you zoom into an image produced from a tiny sensor, the image quality degrades almost instantly, while zooming into an image from a large sensor still yields a beautiful image.
Consider the common scenario of trying to capture images of a large construction site. Multiple cameras are of course the best solution to present a range of perspectives on the project, but camera systems are not cheap, and finding multiple mounting locations can be really painful. A movie could be made by switching from the perspective of the multiple cameras, or pan & zoom could be applied to the image that captures the entire scene. This can be a great advantage of a large sensor camera.

The concept is easy enough, but take a minute to really understand the advantage of larger sensors. Let’s say your final time-lapse video will be presented in standard HD1080 format. Given a typical tiny sensor with a resolution of 6MP, you can zoom in by a factor of 1.7 and still have achieve HD resolution. If you are using a typical 24MP APS sensor, you can zoom in by a factor of 3.5, more than twice as far! You can now highlight lots of details in the scene, at HD resolution. If you are using a full frame sensor in a Cyclapse housing, you could zoom in even farther.
In this example, as you step to a larger sensor size, the pixels are also progressively larger. SLR cameras allow you to zoom in significantly further, and achieve higher quality at the same time.
Focus: Fixed/Auto/Manual
The fixed focal length lens on a tiny sensor camera also has a fixed focus distance. This means that it’s intended to focus optimally from some nearby distance all the way to infinity. For most applications, this is perfectly fine. However if you are trying to capture the growth of a seed into a stalk of grain, you may need a lens that will focus more closely, and these are generally designed for large area sensor cameras.
A camera with a zoom lens will likely have auto-focus capability, but this is not what you need! For a long term project, you want to have the lens focus at the same distance, shot after shot, year after year. This means using manual focus. Some lenses have a manual/auto switch on the side of the lens, generally meaning it can be manually focused. Set the focus at the beginning of the project, switch to manual and then wrap the lens with gaffer tape to keep it from ever moving again. A few lenses for SLR cameras are ‘focus by wire’, meaning that they always use motors to set the focus. Some will move over time, when the power is turned on and off. These can sneak up on you, so do your homework. Almost all mirrorless cameras use focus-by-wire lenses, which are essentially useless for long term. You must use an adapter to a manual focus lens.
When using an SLR camera, you can also apply creative effects to your project, such as adjusting the depth of field (aperture size), and the drag (shutter speed), which you cannot do with a tiny sensor camera.
Lens size: Dust/splatter
How long is the camera going to be sitting outside in the elements? The window on the camera housing is going to pick up dust, dirt, and rain drops. You can’t avoid it! Using a housing with a close fitting hood or recessed windows will eliminate rain drops, but it greatly increases dust and insect accumulation. A window exposed to rain can be a real advantage!
If your project is monitoring bird populations on the coast, or bats in a cave, you will also accumulate splatter. How is that going to impact your final image?
Our brain doesn’t have any problem with images where small areas are blurry. The area of the front lens is roughly proportional to the size of the sensor so again, the window of an SLR camera housing may have about 11 times more area than on a camera with a tiny sensor. This means that if there is anything accumulated on the window of the camera housing, a camera with a tiny sensor will be much more affected than an SLR camera.
A small bit of splatter on an SLR camera window may be annoying, but it may completely occlude the image on a tiny sensor camera. Rain drops on a window are frequent on long term time-lapse cameras. They have proven to blur the image slightly on SLR cameras, but are not generally a problem. Consider the effect a single rain drop would have on your cell-phone lens!
Maintenance can take care of this issue to some extent, by wiping the window clean periodically. This is a typical task on a standalone system where the camera may be periodically accessed. If the images are accessed through a network, there may be no periodic cleaning, so this could be a factor. Some SLR camera systems are designed with window wipers to address this. This is not an option on any camera systems using tiny sensors, although it would seem that they would benefit more, given their sensitivity. A tiny window may need to be manually accessed and cleaned much more frequently than a large one.
Housing size
In addition to cost, the great advantage of a tiny sensor camera is the overall size. Consider the relative volume of a Go-Pro camera vs an SLR camera. A weatherproof housing takes much less material, and then there are mounting considerations, etc. All of this extra bulk means that an SLR camera housing may be larger, heavier, and more expensive than one for a tiny sensor camera. In practice, this doesn’t seem to be a factor in the system price.
Shutter Mechanism
A long term time-lapse project can require a lot of pictures! A typical construction site camera may take a picture every 5 minutes for 10 hours per day, 5 days per week. This works out to 37,500 pictures per year. Some projects may only last a single year, some may run for many years. Other applications may require a high rate of pictures over a long period of time.
Entry level SLR camera shutter mechanisms are rated for 100,000 shots, meaning the camera body may need replacement or service every 3 years on a typical construction project. Cameras based on a tiny sensor generally don’t have mechanical shutter mechanisms, so they have no particular limit to the number of pictures they can take.
On the other hand, if the scene may include direct view of the sun, the mechanical shutter may have a great advantage! Modern sensors are quite rugged, but there is still a concern for sensor burn-in due to daily exposure to the sun. This may be a problem for the new breed of large sensor mirrorless cameras as well.
Image Access
OK, it’s now pretty clear that the huge difference in sensor size creates trade-offs in design, image quality, camera positioning, and other real factors. Let’s talk about the other design distinction among time-lapse camera systems!
Capturing images of a scene over the long term is the primary objective, but at some point you need those images to your computer for storage, analysis, or to convert into a movie. How do you get them off the camera and onto your computer? Well, fundamentally there are two types of systems.
- Standalone
- Networked
Standalone
 Sheldon Glacier, Antarctica. Redundant standalone camera systems.
A standalone system is one that does not require networks or AC mains power. It may be watching over a glacier, crops in a field, on a mountain side, or down the road looking at the new housing project. You don’t need to figure out how to connect it to a network, or set up remote storage and access. The images are generally left on the camera’s memory card, and the system is powered from small solar panels.
A standalone system means you have to visit it to manually gather the images. On cameras that are easy to access, you just open the housing and swap the memory card in the camera for an empty one. Close the housing, drive away, put the memory card in your computer at the office… done. Lots of cameras are mounted out of reach on a utility pole. Hopefully you have a camera system that includes a long USB cable to download the images to your laptop, or to connect a remote flash drive.
Let’s consider a typical construction application. You may have three cameras on-site taking pictures from different perspectives. The final edit will switch among these perspectives to show more detail and make the time-lapse movie more interesting. If you are taking this project seriously, you’ll be doing more than relying on those cameras. You will be visiting periodically to take beauty shots of the site, capturing video of workers, and doing short time-lapse sequences of milestone activities. Since you are visiting the site anyway, gathering the files from the cameras is convenient!
If the site is at a great distance, you might hire a local photographer to gather the files and occasionally wipe off the windows, as well as take beauty shots. They would love your business!
Standalone system operation is simpler, and simplicity may lead to higher reliability. Configuring connections to networks is not trivial, and network connection reliability isn’t always high. If you aren’t required to have immediate image availability, a standalone system can be very cost effective and reliable.
Networked
 High vantage point in South Africa
There are a number of reasons you may not be able to gather the images directly from the site. Perhaps the camera is located in a dangerous area, and you have to get special permission to access it.
Maybe you are managing cameras that are located in the next province. Perhaps you have a customer who insists on seeing images every day! You may think the time-lapse camera is perfectly sited to capture the essence of the project over time, and you won’t need to visit the site!
Many clients believe that they want to see the original pictures from the site, every day, instantly. In practice, receiving notification every 5 minutes that another picture is available becomes annoying as soon as it begins! Too many images come in too quickly, and the client will quickly stop looking at them. A more reasonable approach is to generate a weekly progress video clip for the client. They can get a sense that the project is progressing, and then can request individual high resolution stills as needed to review particular events.
While there are solutions for most of these concerns that don’t involve networking, it can be mighty convenient and relieving to see those image files showing up on the ‘cloud’ every day, without any effort on your part!
A camera system can be connected to the internet via four possible paths. Few systems can connect using any of the four methods (Cyclapse Pro), so make sure the system you buy can support the infrastructure available at your site.
- Ethernet
- WiFi
- Cellular Modem
- Satellite Terminal

A local network will use Ethernet or WiFi connections. Ethernet is very simple, fast, and reliable, but requires a cable to the network equipment, and cables can be expensive to install. WiFi is wireless, but requires a router within range, and it’s connection is less reliable.
If there is no local network on site, you may decide to use a cellular modem to connect to the internet. Cellular networks are very handy, but setup is not always trivial. You must carefully consider the amount of data transmitted (number of images per week, size of image files), to fit within the constraints of the cellular data plan, and it’s recurring cost. The site must have good cellular coverage as well. Some systems have cellular modems built-in, which greatly simplifies setup, but strictly limits use to selected networks. Other systems use USB cellular modems, requiring an extra step in the setup, but allow the system to be used anywhere.
In extreme cases, where there is no local infrastructure at all, it might be possible to transfer images via satellite terminal. This requires a lot more power, much more expense, and the amount of data you can transfer can be extremely limited.
Where do you want the images? If the images are transferred from the camera to a server on your own network or the internet, you will have immediate access to them. Eventually you will want them on your own computer for video clip processing. If you are providing a service to the end client, you can submit video clips as progress reports.
Another option is to use a dedicated time-lapse image presentation website to store and view the images. There are a number of companies that use their own ‘back-end’ servers for this purpose. You can log-in to these websites to view your images and even self-generate time-lapse clips. These services will of course come with a monthly fee.

Back-end sites will not include creative video editing tools, such as mixing camera perspectives and pan & zoom in-frame techniques which all dramatically increase the value and utility of that video clip. These operations must be performed by a human who has a sense of the particular goal of that video. If you don’t want to spend this time yourself, there are plenty of media companies looking for work.
The camera system hardware of a top-tier supplier is not any different than the rest, but they will install and maintain the equipment, and their back-end websites will include more features. The ultimate service is the use of their in-house operators to provide video editing services from the images on their servers. The equipment manufacturer then becomes a complete end-to-end (TurnKey) time-lapse service provider.
Long Term Time-Lapse Systems: What’s available?
 All long term camera time-lapse camera systems must include some basic features. Any camera system will include electronics to power and control the camera, and an environmental enclosure is essential for outdoor work. You might be surprised at the number of pieces to the puzzle!
Most systems will incorporate internal batteries. In some applications, it can make sense to operate from batteries alone, but most use a source of external power to keep that internal battery pack charged, allowing operation through power outages and gloomy weather.

If the system is power efficient, solar power has been proven to be both extremely reliable, and very low cost compared to all other forms of power, particularly AC mains power! If the system isn’t designed for efficient use of power, the manufacturer may start talking about solar panel ‘arrays’… yikes!
There is a surprising variety of system types available today for long-term time-lapse. If you’ve read this far, stick with me… there are some interesting differences to discuss.
 Time-Lapse Systems at a Glance
Each system type described below includes a list of links to companies. This list is of course incomplete. Most of the companies on this list were found by a quick US based Google search. There are many more companies around the world that manufacture these types of systems.
Note: If you operate a company that is mentioned or linked here, and don’t want to be represented, please let us know. Conversely, we’d be happy to include your company here as well, if appropriate.
"Low Cost"
These tiny sensor cameras are great for 'sprinkling' around a construction site in hopes of capturing something useful. You should carefully consider their design compromises before using this type of standalone camera as a primary camera on a professional project.
This camera type is clearly represented by one company, with prices under $200!
Please check Brinno.com
"Action"
A wide range of 'action' cameras are on the market, most notably Go-Pro. There are a huge number of substantially lower cost cameras coming out of China, some of which have competitive image quality. The action camera market is pretty hot, and the image quality has improved to the point where they can be considered to be adequate.
The sensors used in action cams are tiny, and the cameras are expressly designed for ease of use and cost over image quality. Action cameras generally use high compression to keep file sizes small, yielding images that cannot be usefully ‘zoomed-in’. The angle of view from these cameras is ultra wide, generally 120 degrees, so they must be placed very close to the ‘scene’ in order to capture any detail.
There is perhaps the only company that has made inroads into the action camera time-lapse market, mating a time-lapse controller to a Go-Pro camera. Their cameras are generally standalone, but it appears they are adding some additional technology to allow networked operation via WiFi.
Action camera technology changes rapidly, so maintaining a camera system that is several years old could be difficult. The cost for such a system appears to be just under USD $2K.
Please check cam-do.com
"Cellphone"
While cellular phone cameras of course use tiny sensors, some models have image quality better than action cameras, and have the added capability of built-in networking. In some cases, the image quality is surprisingly good, and in favorable conditions approach that of SLR cameras. This is achieved through very carefully tailored software to correct and improve images within the phone.
While there are some Apps available for phones that are great for short-term time-lapse, there don’t appear to be any companies providing the additional support required for a long-term project. Technology constantly changes, making it a difficult prospect for both system manufacturers and customers.
"Tiny -Networked"
There is a large class of networked digital video cameras on the market… think security cameras, which of course use tiny sensors. The image quality of security/IP cameras is getting better over time, and their cost is quite low due to huge manufacturing volumes. They require Ethernet connection to transfer the great volume of video data, and need a fair amount of power. The video resolution from these cameras is much lower than the resolution of digital stills, so there is still an advantage to collecting still images for close inspection and for time-lapse applications.
A variation on this type of camera is one designed specifically for operation on construction sites, using cellular networking, solar power charging of an internal battery pack, and intended to produce digital stills images for time-lapse. The sensor size is not typically advertised, suggesting that it is very likely tiny, and subject to all of the compromises described above. The sensor is embedded with the rest of the electronics and a fixed lens is used, creating a small package which reduces the costs to the manufacturer. The system prices may vary from USD $2K to $5K. Oddly enough, this is about the same price as SLR based systems that will provide better images and much greater flexibility.
Please check:
- senserasystems.com
- mktimelapse.com
- onsiteview.com
- truelook.com
- ibeamsystems.com
- enlaps.io
"SLR -Standalone"
OK, enough talk about tiny sensors! SLR cameras are a natural for capturing high resolution, high quality images for creating crisp, detailed, colorful time-lapse videos. While SLR cameras are impressively reliable and are designed for rugged use, they aren’t suited for long term unprotected use, so they have to be placed in a housing with a window. Add solar power, a good sized internal battery pack and a time-lapse controller, and you have a system (sounds easy, doesn’t it!).
 Standalone Cyclapse system in Australia
All of the systems described from here forward generally use an entry level camera from Canon or Nikon having APS size sensors. They will all produce equivalent images. The Harbortronics Cyclapse housing is unique in that it can also accommodate Full-Frame SLR cameras for another jump in image quality, and even medium format cameras, for a leap in quality! Network data limits and expense often lead to reducing the number of images, or applying compression when transmitting image files. This is rarely a concern on a standalone camera, suggesting you won’t need to compromised image quality and editing flexibility.
Harbortronics has been the undisputed king of the standalone SLR market since 2006, with over 5000 systems shipped for use all over the planet, literally from pole to pole. Key factors for standalone use are small solar panels, mounting flexibility, no monthly fees, and ease of access to the image files while mounted high overhead. Depending on the features, the system will be from USD $2.5K to $3.5K.
Please check:
"SLR -Networked"
Networked cameras can be configured to automatically transfer images to the internet (cloud), allowing operators / customers to view the images without visiting the site.
Networking adds a level of complexity that can be daunting to many customers. An image repository server must be employed, and the system configured to deliver images to that server. Connection to the internet can be via Ethernet or WiFi connection to a local network, or via a cellular modem connection. Cellular connection is physically the most convenient and common as it can be completely wireless (assuming solar power), but configuring for and connecting to arbitrary cellular systems around the world is not straightforward. This added complexity reduces the appeal to most direct consumers who don’t have access to networking resources.
Some manufacturers sell equipment outright in this market, but most prefer to rent equipment and provide configuration and cellular plans on a contract basis. This type of system enables media companies to offer time-lapse services to their own clients. They take the time to understand how to configure the system for the local networks, to provide image storage, status monitoring, and finally to provide final video editing. Equipment ranges from USD $3K to at least double this.
Please check:
"SLR -Monitored"
Companies in this market segment offer on-line software to manage the huge number of images that are sent to the cloud. Reports can be generated, time-lapse video clips created, and the operational status of cameras can be monitored by the service company.
The camera equipment is almost a side-note for the business. The profits for these companies are made on the fees for their services. There are a number of companies in this segment all over the world. The prices for services are not advertised, due to the range of options and competition.
Please check:
- sitehawkusa.com
- earthcam.net
- ibeamsystems.com
- oxblue.com
- photosentinel.com
- video-monitoring.com
- webcampak.com
"SLR -TurnKey"
Field installation and maintenance are included with the rented cameras, and teams of people produce time-lapse movies from the accumulated images. There are a few companies that can offer all of these services. Generally these companies are regional in order to offer best support to their clients. Expect to pay premium prices for premium services!
What type of photographer are you?
There are a lot of applications for long term time-lapse, and each application may be best served by a particular ‘class’ of equipment. Let’s list some potential users and some common applications, making some assumptions about the size of the project, the resources available, and the amount of money that can be allocated to camera equipment, and finally recommend the classes of equipment that make sense to consider. Who are you?
- Individual
- Researcher
- Contractor
- Local Construction Company
- Regional / International Construction Company
- Municipality
- Small Media Company (individual photographer)
- Local Media Company
- Regional Media Company
Individual
 I’m about to build a wood-fired oven into my back-yard deck, and I’m so excited to show it off from start to finish! The resulting digital stills and video will be used to show to my friends and family. The final quality isn’t as important as the cost of the camera, and it’s simplicity.
- Relatively tiny project, such as building a shed
- I’m handling everything myself, but I don’t want to build my own camera.
- All costs are out of my own pocket
- Equipment: The clear choice is a “Low Cost” system.

Researcher
 There are so many things to learn!
- Life cycle of glow worms in a New Zealand cave
- glacier melt in Alaska
- ice caves / ice lakes in Greenland
- crop productivity in Iowa
In addition to the visual impact of seeing glaciers recede over a few years, measurement using correlated points in the images will be used to estimate areas and volume. When identifying species, counting populations, and other scientific work, image distortion, resolution, and dynamic range are all real factors.
- Tiny to large scale projects
- We have graduate students available to help, who are eager to learn.
- Costs are always an issue. The equipment must be owned and useful for future projects.
- Equipment: “SLR -Standalone”

Contractor
 My partner has been bugging me to put together some videos for our website, so we can show potential customers our range of capabilities.
We need a camera system that we can use for a few months, re-install on another site, rinse and repeat.
Once we get the hang of it, we’ll be doing time-lapse videos of all of our projects.
- Smallish scale project, such as building a house
- My brother-in-law is a web developer, and our framer is interested in helping. We are working the site, so we can place cameras anywhere.
- I share in the costs. There is no way to justify the cost of rental / serviced equipment.
- Equipment: “Low Cost”, “Action”, “SLR -Standalone”

Local Construction company
Construction of a 4 story building is a real challenge! The heart of our small town is about to change, and this is a project that we would like to document thoroughly! We hope to use the data to review and improve our efficiency on subsequent projects.
At the same time, we’d like to have a demonstration video for our website, our customer wants to have some show-off videos, and the local media are always looking for interesting content.
We have thought this through ahead of time, and want to make sure we capture everything from multiple points-of-view.
- Medium scale project, such as building a road or housing block.
- We have some IT resources in-house, the site manager is an amateur photographer, and a local media company has agreed to perform the image processing.
- Costs are mostly passed along to the customer, but we have to be careful. We would like to own the equipment to use on future projects.
- Equipment: “SLR -Standalone”, “Tiny -Networked”, “SLR -Networked”, “SLR -Monitored”

Regional / International Construction company
During the construction of a bridge over the river, a subcontractor sent us invoices for work which surprised one of our staff. The Department of Transportation had installed some time-lapse cameras for historical use, and they let us look at the images.
In reviewing the high resolution digital stills from one camera, we proved that the invoices were bogus.
A webcam would not have had image quality sufficient to fight the charges, and the cost of the camera system was nothing compared to the money it saved us! The images also made for a great video for the public at the end.
We’ve since contracted for cameras for each of our sites, to show off our projects, and keep track of contractors.
- Large scale project. We’re building a new tower downtown.
- We have plenty of in-house resources that could manage the project, but we prefer to hire it out, and stay focused on our own tasks.
- Costs are passed on to customer, and are not a factor.
- Equipment: “SLR -Monitored”, “SLR -TurnKey”

Municipality
Our downtown park is old and poorly suited for the current uses. A generous donor has funded a plan to redesign and rebuild the park! We want to have a set of documents and videos that address both the design and the construction, and we’d like to do a good job of it.
High resolution digital stills images are essential for the record. Some of it will be distilled down to some internet clips and to one or more high quality productions for various interested parties, but the bulk of the material will be preserved in archives.
- Medium scale project, such as renovating the town square.
- We plan to train a local city employee to handle the camera equipment and gather the images. We have an in-house media group who can handle the image processing and documentation.
- Funding is tough! These cameras need to have a low annual cost of ownership.
- Equipment: “Action”, “SLR -Standalone”

Small Media Company (Individual Photographer)
During the upcoming week-long street fair, a local monk is going to be creating a complex sand-painting in their booth. We’d like to show overhead time-lapse clips of this each day on the local news. The resolution and quality are small factors compared to getting it set up efficiently.
- Small scale project. Local contractor needs a demonstration video.
- I am the only resource! The equipment needs to be straightforward to use and install. I’ll be visiting each day.
- Costs are a big factor to my customer, and to my profitability.
- Equipment: “Action”, “SLR -Standalone”, “DIY” with off-the-shelf controller.

Local Media Company
We an an event planner, frequently setting up tents and bandstands, and catering for NASCAR events. We’d like some equipment that we can install at each event to capture the setup and tear-down, as well as all of the people milling about during each event. We’ll have videos on our website to show off our capability, and then offer the video to the event hosts to use on their websites! We are taking it seriously, but can’t go overboard with the costs. Image quality is of course a consideration, but it has to be portable and easy to set up.
- Small – medium scale project.
- Media is one of our specialties. We need a system to integrates well with our other videos and stills. We’ll be on-site during the project.
- Costs are a factor to our customer, but performance is key.
- Equipment: “SLR -Standalone”, “SLR -Networked”

Regional Media Company
The museum just got approval to build a new wing! They want to document this well and create a great looking in-house video to impress the board-of-directors and other stakeholders, who all have varying perspectives and concerns. Eventually they want a permanent display in the lobby showing a time-lapse of the whole project on a huge screen. The quality must be top-notch!
- Medium-large scale project. Document the construction of a new traffic circle, and traffic flows before and after.
- We have plenty of in-house resources for the job, but also want to have the images available daily for presentation on a blog. We’d also like the ability to have live video of the site, but recognize that this has different goals as time-lapse, and may require different equipment. While we will be on-site periodically, these cameras are going to be really hard to access!
- Producing a great result is everything. Costs aren’t a factor.
- Equipment: “SLR -Networked”, “SLR -Monitored”

Long Term Time-Lapse Shopping Checklist
When picking out a system, there are a lot of things to consider.
Each of the manufacturers advertise with beautiful pictures of projects from their customers. These images are carefully picked to show the systems at their best, so do your homework to make sure their offered equipment (and image quality) is well suited for your needs.
Many of the manufacturers don’t put prices or detailed specifications on their websites. There is a reason they have chosen to do this, rather than openly display everything.
It’s human nature to favor a product that someone has taken the time to discuss with you over the phone. They want you to call them so they can talk you into a sale!
There may also be a lot of options and details to discuss to optimize the system to your needs. Take the time to talk to each vendor that has a system that you have an interest in, and take good notes. You may be living with this choice for a long time! Here’s a list of prompts that may help you.
What does the system include?
- Housing
- Camera
- Controller
- Battery
- External power connection
- Ethernet Connection (networked)
- USB connection (image file download / remote flash drive)
- Solar panel
- Mounts
- Tools
- Warranty?
Housing
- Is it sealed, or vented?
- Vented
- How do they handle moisture?
- Desiccant (silica gel) pack replacement?
- Are there fans? (power draw, dust filter replacement)
- How do they handle moisture?
- Sealed
- How well sealed? A ‘pretty-well’ sealed housing can be a moisture pump!
- Lead-Acid batteries cannot be used in a sealed housing.
- Vented
Mounts
- What mounting structures do you have available on site?
- Existing building walls, parapets, ledges?
- Existing utility poles? (Wood or metal)
- Contractor installed utility pole?
- DIY – water pipe driven into ground, etc.
- What mounts are recommended for YOUR structure?
Window
- What is the window made from? (Glass is much more scratch resistant than any plastic)
- Is the window coated? (All exterior coatings will eventually degrade in the weather)
Internal Battery pack
- What is the capacity? If more than 100 watt-hours, can they be shipped?
- How long will it last without external power? (Unplugged)
- Replaceable? (Most rechargeable battery packs have a 3-5 year life)
- Options for more than one battery? (Longer periods of gloomy weather)
- Battery chemistry? (Affects charging temperature range)
Camera
- If SLR, Manufacturer / Model?
- Can I use my own camera / lens?
- What size is the sensor? (Tiny / large)
- What resolution?
- Typical image file size?
- Sample pictures? Low light/ rainy weather… not just well lit blue sky days.
- Shutter life?
- User replaceable?
- Lens?
- Fixed lens: Horizontal angle of view?
- Zoom lens: range of zoom / angle of view
- Manual / Auto / Fixed focus?
Controller
- Time-lapse schedule interval – configurable?
- Scheduling: Window of time during the day, days of week, months of year?
- More than one schedule? (Work day, plus different schedule at night?)
- Periodic power reset to camera?
External Power
- Solar Panel?
- What size do they recommended for YOUR application?
- Mounts available for panel? (Make sure it’s suitable for the wind in your area)
- Orient panel optimally to the sun, while camera in a different direction?
- Is the panel attached to the housing, or independent? (wind vibration)
- AC Mains Power?
(Running an underground line can cost as much as the equipment!)
- Power over Ethernet?
- If you are operating from a polar weather station, battery bank voltage?
Image Access
- Standalone
- How do you extract the images?
- Card swap
- Download from camera via extended cable
- Transfer to local flash drive through extended cable
- Networked
- Where are the images stored?
YOUR server, or theirs?
- THEIR server
- Can you access the original images, or just reduced size copies?
- What are THEIR rights to YOUR images?!!!
- Is there a data limit?
- YOUR server
- What data protocol does the camera system support?
- Suggested server providers?
- Local network, or just cloud?
- THEIR server
- How do you extract the images?
Costs
- Initial Price
- What are the up-front costs?
- Purchased system price & shipping
- Leased system
- Initial contract price, above recurring lease
- Installation
- Shipping
- Connection fees
- Are tear-down fees included up-front?
- What are the up-front costs?
- Recurring Costs
- Network connections
- Data charges
- Maintenance / service plan
- What if the shutter wears out?
- Theft / vandalism / lightning damage?
- On-phone support charges
- Contract Duration / Termination Fees
- Service Charges
- Data storage
- Monitoring
- Status reports
- Time-lapse video production & editing
More Resources
The article above introduces the various equipment choices you have when approaching a long term time-lapse project. There are lots of other resources on the web to go deeper! Mounting, camera setup, scheduling, and post processing are other subjects that will be taking up a lot of your time! Perhaps some of the following resources can help.
Articles
There are lots of articles on the subject of time-lapse. As with most articles of this nature (including this one), the author may be biased by their relationship with an equipment company, so bear this in mind :)
- Tutorials on Time Lapse Network
- What camera should you use for long term time-lapse? Or, why you don’t need a Canon 5D Mark III!
- Making A Long Term Timelapse Camera Box For Seasonal Timelapses
- How to Shoot a Long Timelapse with a GoPro HERO4 Silver or Black
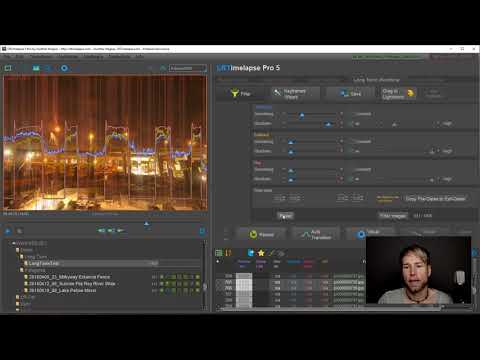
- Long Term Workflow in LRTimelapse
- How do you do a long term time-lapse?
- 5 Must-haves for a Successful Long Term Time-Lapse
- PREPARATIONS FOR A LONG TERM TIMELAPSE
- Corporate Uses for Time Lapse Video
- DIGITAL CAMERA SENSOR SIZES
- Why small sensor size may leave your photos feeling inadequate
- The effect of pixel size on noise
- Digital Cameras: Does Pixel Size Matter?
- Pixels: Size Matters
Time-Lapse Web forums
- https://timelapsenetwork.com
- http://forum.timescapes.org/phpBB3/index.php
- https://www.facebook.com/groups/longtermtimelapse/
- https://www.facebook.com/groups/119025808124451/
About the Author
Mark Roberts is the Chief Engiwebneer at Harbortronics Inc.
He has developed products for countless industries, specializing as a high-tech radio contract designer before starting Harbortronics.
Since 1998 he has focused on developing camera systems for challenging environments, with designs used all over the planet, literally from pole to pole.
Notable products are the DigiSnap 2000 series controllers, the Time-Lapse Package, the Hydrolapse, the Cyclapse Housing, and the DigiSnap Pro. In addition to terrestrial time-lapse, he has developed a number of oceanographic camera systems.
You may reach him via his company websites:
- harbortronics.com
- cyclapse.com
- aquapix.net