Welcome to the most comprehensive step-by-step workflow to the production of a time-lapse video available online. Learn how to make a time-lapse video, and how to avoid the most common mistakes made by beginners!
Before proceeding, make sure you've got all it needs to start shooting your first time-lapse sequence. Need to double check this? Head over to What do you need to create a time lapse video?
How to create a time-lapse video?
Before we get started
Please note that this is not “the” definitive workflow, but in these pages we will describe what we believe is most suited to the production of a time-lapse video, giving as much information as possible so that you won’t fall foul of some of the most common mistakes made by beginners.
Note: If you’re preparing to shoot a sequence of astronomical images, things change – and for this reason we advise you to read the astronomical tutorial dedicated to this practice, such as How to create a time-lapse video of moving stars.
Let's start!
1. Choose the subject to shoot
The first things you need to ask yourself are:
- What do I want to photograph?
- What do I want to represent, and how?
The time-lapse technique is used to artificially speed up the time out of proportion, so choose a subject – and the resulting framing – that can be considered interesting and especially that tells a story that would hardly be noticeable by the naked eye in natural conditions.
For example: photographing moving clouds is very academic, and that’s great for your first attempt at time-lapse. But this could be rather boring to watch if you do not compose a shot with items that stand out against the background.
Choose to follow the normal rules of photographic composition, because they apply even in the creation of a good time-lapse scene.
2. Place the camera on a tripod, and level it
Have you checked that you have charged the batteries? Good, then you are ready to start.
Now that you’ve chosen your subject and the framing of the scene, you can set up the tripod. If you own a quite recent and not-so-entry level DSLR (such as a Canon 7D or Canon 5D Mark II), exploit the fact that you have available a levelling system by pressing the INFO button repeatedly. You can then proceed to adjusting the tripod legs in order to realise a straight and beautiful shot.

You can do this in post-production, but why do so if you can just spend a couple of minutes more before shooting and get it right first time?
3. Get ready for the shooting session
The first thing to do is to format the memory card: taking so many pictures quickly fills the Memory Card, so don’t leave room for such problems.
3.1 Choose the right format of shooting: RAW, JPG, or both?!
If you shoot in RAW your camera produces high-quality images, which takes up a lot of space on the memory card.
The JPG format instead will save more than 60% of the occupied space, so in practice you can take many more pictures on the same card, compared to the amount you’d be able to save in RAW.
If this is your first attempt at time-lapse, the quality of RAW may not be as worthwhile as you think.
On a Canon 7D, for example, shooting in RAW means to produce a file of 5184 × 3456 pixels per frame. Even if we make a time-lapse video for a Full HD TV (i.e. with a resolution of 1920 × 1080), it would take only a little more than 2 megapixels per frame.
Shooting RAW would then mean
- carrying out post production work on every shot (optional)
- the waste of computing time converting images from RAW to JPG resizing the JPG format to be suitable for Full HD TV
Considering that a video is composed of about 24 frames per second, when it comes to convert 1500 photographs, it’s just not worth it; at least not if you have created the time-lapse of your life!
If your intent is to carry out serious post-production after shooting – perhaps to emulate the use of a motorised rail (dolly) – then shooting in RAW may be a definitive choice for you.
3.1.1 Always prefer the RAW: take a look at what you can do!
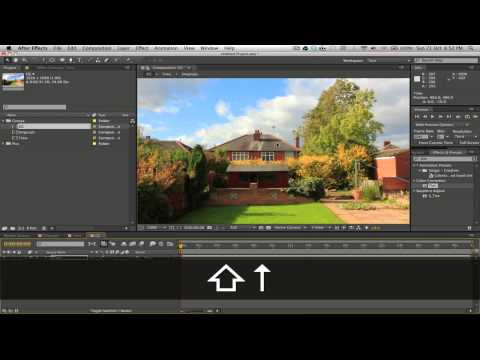
Below you can see 3 significant images of before and after the post-production of a time-lapse built by Giovanni Antico, the instructor of the Time-lapse workshop in which TLI took part in 2011.
Giovanni has then made a comparison between the JPG snapped out of the car and the final frame after the post-production from RAW files, until the last step after Lightroom, LRTimelapse and After Effects.
Night shooting is a good example of how RAW can help you retrieve, and save a time-lapse made during the most critical conditions.


Now that you have all of the information, you can decide if you want to opt for a fair compromise.
3.2 The best compromise? sRAW + sJPG
Once you have acquired familiarity with the technique and you approach time lapsing in a more serious way in order to produce a good result, then you’ll want to go for the best possible compromise, if your DSLR allows, which is to: sRAW + sJPG.
What does it mean? On the Canon 7D or Canon 5D Mark II you have the ability to enable a reduced RAW (4.5 megapixel instead of 18Mpx for example), this offers these benefits:
- retains RAW information, so you have a lot of freedom in post-production and higher quality of the stored image
- uses less than a third of the space than required for the full RAW
- is faster to deal with in post-production
sRAW + sJPG means that the machine will store in parallel two files: one sRAW precisely, but also a JPG low resolution you will use to get a quick video preview of the final sequence, without having to move from the post production in Lightroom, for example. All of this at a cost in terms of disk space occupied which is considerably lower than Full RAW.
3.3 Use Live View - if possible - the focus of the subject
If you have a good recent DSLR, then you also have the option of using live view (i.e. the view of the scene on the outside screen of your camera): you should consider using this because it is very useful.
Sharpen the exact spot you are interested in – using the two small buttons on the top right of the zoom on the Canon 7D for example, to select precisely the area and then keep the subject in focus. Once you find the perfect focus, unplug the AF focus of your lens and leave it to MF.
In this way you’ll avoid wasting battery unnecessarily to focus at every shot, and you’ll avoid your camera automatically deciding what to focus on shot by shot - a practice to be avoided!
Make a little test shooting, and keep in mind the values (Aperture and Shutter speed) that the automatic system may suggest.

3.4. Set the correct shooting mode
Let us now fix the basic settings to be used to properly prepare the camera for the shooting session, and avoid hassles later:
- Select the manual mode completely, or at least prefer aperture priority mode (Av)
- Set the ISO value you think is the best to use at that time: avoid like the plague the Auto ISO
- Set both the aperture value and the shutter speed
- Choose the best white balance, but do not set the automatic white balance (AWB)
- On the lens, set the focus totally manual (MF). This will allow you to minimize the phenomenon of "flickering". (If you want to learn more about the flickering, you can skip to the advanced tutorials).
Let’s see in detail how to deal with the choice of aperture and shutter speed.
3.5 What is the value of aperture and the resulting shutter speed to set?
It all depends on how much depth of field you want to achieve, and the shutter speed you want to set.
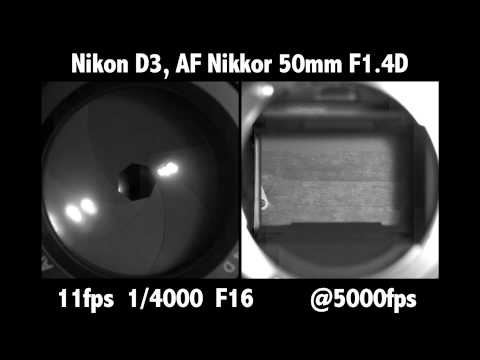
Setting the correct shutter speed is very important when you make a time-lapse. The higher the shutter speed (1/125 or higher), the lower the effect of fluidity in movement that will affect your subject in the final video.
A good rule is to set an exposure value a little below the value of half of the interval value between two clicks.
For example, if you shoot at an interval of 4” between each frame, you should adopt an exposure time of about 1.6”/2”. Do note that this rule is clearly not applicable should you wish to shoot one frame every 60 seconds in broad daylight.
If people or moving objects appear in your scene, it is essential to make sure that the subjects in each frame are “fuzzy” (this does not mean out of focus). i.e. they should have a trail behind them.
Subjects too well defined would give it the look of that annoying “blink.”
If you are shooting in broad daylight, and you cannot lengthen the time of exposure to acceptable levels – despite having lowered the value of ISO 100 and having set F16 as aperture value – then the only solution will be to use ND Filters.
4. Set the interval: how many pictures to take, and how often?
Depending upon the subject that you want to shoot, you will need to use different times and intervals. There is no golden rule to apply, but only suggestions dictated by common sense and experience that you may have carried out in the field.
We assume that videos on TV are transmitted on an average of about 25 frames per second. This value is double for movies shown on TVs which are Full HD 1080p, but let us work on the first option, which means that every second of video requires 25 frames.
In time-lapse, one frame is equivalent to a photograph. For a video of just 10 seconds, you will need 250 photographs. One minute of time-lapse takes approximately 1,500 shots.
That said, it is also easy to calculate how long it takes to achieve the desired sequence. Assuming you take 1 frame every 4 seconds, it will take 250 x 4 = 1000 seconds = 16.6 minutes to process our 10 seconds time-lapse video.
 Use an online free time-lapse calculator instead, and get rid of doing any math!
4.1 Time Lapse Calculator, the pill that prevents the headache
If you do not want to have a headache every time you’re ready to begin a new time-lapse then you should consider downloading an application called the Time-lapse Calculator - or use this free online time-lapse calculator by PhotoPills.
This simple tool allows you to enter the parameters of the project you already know (i.e. the total duration of the event and the length of time of the final output, considering the number of frames per second), then, based upon the data entered, the software calculates the time interval to set and much more.
Want to play tough games, and get extra help? Then you must be using IguanaLapse iOS, the App to create professional time-lapse with iPhone, iPad and iPod
4.2 What interval to set between on shot and the other?
There is no precise answer, because it depends on the ISO set, on the aperture and the shutter speed. We will try to give you a rough idea of the settings to use, depending on the subject you want to photograph.
Clouds and sun
On a windy day, where the movement of the clouds is really quite fast (and therefore also perceived by the eye without effort), you’ll need to shoot with a variable interval between 5 and 20 seconds between one frame and the next, depending on whether there is more or less wind.
People, traffic, urban
If your subject is people in a well-populated street of a city, or cars and traffic, a good idea is to use an interval between shots of 1” and 4”, also taking into account the blur effect to be given to pedestrians. If you’re in full sun, make use of ND filters.
Stars, moon and night shots in general
These are amongst the most difficult to capture and “to make good” on the screen, unfortunately. Here you will enter into astrophotography (in this regard we recommend the excellent tutorials, written by our amateur friends of TLN).
In general you have to keep in mind that you need very bright and expensive lenses, quality and sensors that have a good ability to avoid the digital noise to get good pictures.
Not only that: it is essential to have exposures not longer than about 20”/25” each because you wouldn’t get stars any more, but trails of stars (the so-called star-trails). In this case, a Canon 5D Mark III is the ideal choice – for its price – as it can generate the least amount of digital noise between DSLR cameras under 2500 €. If you have one, shoot at ISO 3200 with exposures of 15”/30” each. A good setting for the aperture in these cases is between f/2.8 and f/4.
If you want to know more about this matter, consider reading our Indicative table of exposure times and intervals for time-lapse.
4.3 Precautions
Always keep in mind that the machine must be allowed to have a minimum time after shooting to store the images before moving on to the next step.
Not only that, if you shoot with aperture priority (Av) a scene at sunrise or sunset – or, more generally, with changing light conditions, there is another risk to be taken into account. If you give a rather narrow time to the intervalometer, the risk you run into is that the camera will “jump a frame” because it does not react to the input coming from there intervalometer if in the meantime the shutter is still open for the shot before.
This is especially true in the evening/night sessions of shooting: be careful, and keep an eye on the camera, especially in those moments. Then, make the necessary adjustments taking extreme care not to touch or move the camera or the tripod!
5. Press START, relax.. but keep an eye on the situation
Take a couple of test shots to see if you’ve fixed everything and the framing is as perfect as you wanted. Use the Time-lapse Calculator to figure out how long you’ll be there to relax :-), press START and enjoy the atmosphere and the tranquillity around you!
Making a time-lapse is in fact something relaxing, which allows you to express your creativity while you enjoy a moment of relaxation, perhaps alone in the mountains, accompanied by the sound of the shutter that snaps.
A few more considerations: if you are shooting during sunrise or sunset, you need to keep an eye on the shots. This is to avoid any unpleasant under/over exposure and consequently shots thrown away at the end of the session.
Occasionally, therefore, look at the preview of the shot on the screen, and if you don’t like it, you can always – very gently – change the value on the go. Obviously, don’t give a huge change in the settings, but every 5/10 minutes fix the shutter speed by one step, making it a little more “smooth” so that you’ll notice this less in post-production.
6. Go back at home, and create your own videos
Once back at home with your hundreds of photos in sequence, you will want to create the video and see your time-lapse video come to life.
In this basic tutorial, we illustrate how to quickly create the video from the sequence (a sort of quick preview) with QuickTime Pro, the easiest to use in this case.
- Make sure you have in your folder the sequence of images that will make your video, and that they are in sequential order.
- Click on File > Open Image Sequence
- The system will ask you to choose the first image. Click on it, then push Open
- Set the frame rate value between 10 and 30
- Click on File > Save as.. QuickTime MOV to magically get a time-lapse movie through and through
The following two videos will show you how to do this easily on a PC or a Mac:
Advanced time-lapse tutorials
The first part of the tutorial ends here: so what do you think? Tell us your opinion leaving a comment in this article, and share it on social networks if you found it useful.
Our suggestion is that you don’t continue right away in the reading of the advanced guides on the implementation of a time-lapse, but that you do a test – even a small one, of a time-lapse from your balcony – and that you gain confidence with the tools and the complete workflow.
After this, you can start to explore a whole range of ideas that are more complex, or that are not so generic.
You can now get back to the home of our Beginner’s Guide to time-lapse photography on the Time Lapse Network