Discover the necessary equipment to create the perfect time-lapse video with the help of our step by step free tutorial!
What do you need to create a time lapse video?
The first thing you need to know is that you don’t need a €2000 camera to produce a good time-lapse. Believe it or not, some of the best video clips were shot with a €300 compact camera.
The important thing, however, is to be aware of the fact that, while it is true that it only takes 30min to understand the fundamentals of creating a time-lapse, you must have a great desire to experiment and to learn constantly as time goes by in order to create a really good finished item.
Let’s now take a look at what you need to get started:
1. Camera
You cannot make a time-lapse without owning a camera, whether it is a mobile phone, a compact or a DSLR. Obviously, the quality of the final result will be as good as the quality of the equipment you use.
1.1 Built in camera of a cell phone
All good smartphone now possess a built-in camera with a good optical quality, for example: an iPhone 6, a LG G4, a Samsung Galaxy S6. By using such cameras we have been able to produce really good pictures, although obviously not in negative conditions, such as those with low-light etc.
You now need to install a dedicated application suitable for time-lapse photography - that is in fact, a software intervalometer that makes the phone able to take a picture every ‘x’ seconds, in order to produce your time-lapse video. For the mobile Apple, we recommend IguanaLapse or TimeLapse from xyster.net, for Android, Time-Lapse - Lite and for Windows 7 Phones Timelapse.
This is an example of what you can create with an "old" iPhone 4S, entitled "Dubai to Thailand".
Remarkable, isn't it?
In this tutorial we will not expand on the aspect of the realisation of TL (time-lapse) with apps because we think that what you need to know about it has been said already – but we would appreciate it if you let us know if any of you write a tutorial dedicated to an app that you are particularly fond of.
1.2 Compact cameras
Compact cameras provide a step up from the built-in camera of the iPhone, but not yet to the level of digital SLR cameras.
Compact cameras – especially those at the higher end – can already give us great satisfaction, as long as they have an intervalometer integrated to be programmed to shoot at regular intervals in time (if you would like to know more about the intervalometer, you can read further detail hereunder, section 2).
Any compact camera on the market nowadays produces images with a resolution much higher than the “Full HD 1080p”, so better to focus on the acquisition of a compact that gives good results in terms of image quality, and has a built-in intervalometer.
Compact cameras from Canon enjoy a privilege that should not be underestimated: even if they were not built with a built-in intervalometer, there is a hack called the Canon Hack Development Kit that can enable this very easily along with many other functionalities without changing anything on the camera or causing it to lose the guarantee due to changes that is not allowed.
If you’re interested, we recommend you check out the fantastic video tutorial available at How to modify your Canon Camera using CHDK?
1.3 Digital Camera SLR (DSLR)
This is clearly the best choice in terms of cost/benefit: it produces excellent results, high image quality, and a low cost if compared to other cameras for time-lapse that cost tens of thousands of euros.
Even here, you can spend less and start with a second-hand camera like the Canon 60D or even Canon 1110D for example. You can find them on eBay at reasonable prices, and they’re great machines that can be used in full manual mode, and if they smash after putting together a few time-lapse, it is not a huge waste.
If your capital amount to invest is higher, you can opt for a Canon 7D Mark II or Canon 5D Mark III, which will enable you to operate using a very accurate live view, as well as store RAW files with a higher bit depth, therefore providing a greater malleability in post-production. This would take you to a semi-professional level.
2. Intervalometer
An intervalometer is a small device able to trigger the shutter of your camera every n seconds, n times (also infinite). It can be external, or as we saw earlier, integrated into the camera.
The Canon camera bodies unfortunately do not have this built-in function, and require the purchase of an external one. The good Nikons have an intervalometer included by default among the menu items.

The one above is an example: with a Nikon D3 you can go into Shooting Menu, and then activate " Interval Timer Shooting".
For owners of Canon cameras, the ideal intervalometer is the Canon TC-80N3, which allows you to set the firing frequency (i.e. the number of seconds to pass before you want to produce a frame), the total number of shots from 1 to 99 or infinite, and the shutter lag to start with.
If you want to save a little with regard to price, you can go for one of the equivalent of less well known brands, which are much less expensive but equally valid (read: Phottix).
Also, take into account the possibility of using the software supplied with the camera (called the Canon EOS Utility). This gives a solution at no cost, which only needs the connection of the camera to a laptop constantly, since the shoot commands come right from the laptop. It’s not the most comfortable in the world, but it is one of the cheapest.
If you are interested in knowing more then watch this simple video tutorial on creating a timelapse using Canon EOS Utility:
3. Tripod (highly recommended)
Owning a solid and stable tripod is essential for the success of a time-lapse video, although it is not mandatory.
Depending on the camera body (if you are using a DSLR), the lens used, and any extra equipment, the weight of the set will be a couple of pounds at least. A good tripod will support the load without any problems, and will keep the arsenal stable for the duration of the shooting session.
The best advice that I feel I can give you is to orient on a tripod which is quite high (at least 170cm), which allows you to easily reduce the length of a single leg – useful in cases where the terrain is not flat but steep, as in the mountains – and also that it has the detachable head.
This will prevent you from having to spend a lot of time fixing and removing the camera from the tripod.
A good choice – and quite economic (approx. €90) – is the Manfrotto 7301yb, which I am very happy with.
Small note on the image stabilisation: the functionality of the tripod is to stabilise the various images. But do not replace the tripod with the stabilizer of the optics or the result will be disastrous..

4. Software
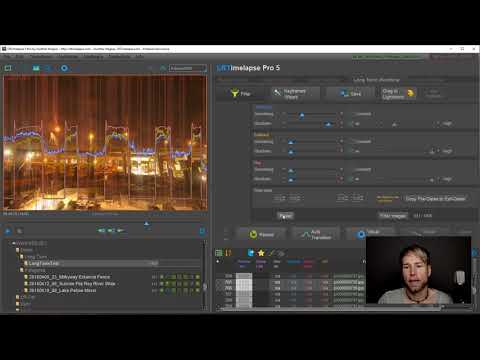
As obvious as it may seem, once you have taken hundreds of photographs useful for the final composition, you will need to use software to “assemble” the sequence, such as PhotoLapse3 (free, good for basic use), QuickTime Pro (about €25), Adobe Lightroom 5 with LRTimelapse and the whole Adobe suite.
We are going to deal with the post-production of your time-lapse video in more detail in the advanced tutorials section.
5. ND Filters (optional)
ND filters are “pieces of dark glass” that can be applied to the bottom of the objectives, used to reduce the amount of light passing through the lens.
With the ND filter in place you are able to shoot in broad daylight using a very long exposure time, giving a blur effect to elements such as water, people and so on.

6. Battery Grip and extra batteries
Feeding the camera continuously and without interruption during the shooting session is crucial to avoid problems of various kinds.
Think of a time-lapse session which incorporates the relative motion of the stars, shooting one frame every 20/30 seconds, and you need to shoot the scene from dusk till dawn the next day. If the battery dies, the session is likely to be thrown away. And if the battery runs what do you do? Do you change the battery thereby touching the tripod or the camera just enough to create a change in the middle of the frame? This would not be a good idea.
For this reason, the use of a battery grip is the best choice to extend the duration of the session, and to allow the removal of a battery at a time without causing the camera to shake.

Continue reading..
You can now proceed with the reading of the third chapter of the time-lapse tutorial: A step by step guide to creating a time-lapse.