- 442SHARES
- Facebook7
- Twitter435
- LinkedIn0
- Reddit0
- Pinterest0
- Digg0
Are you looking for a great guide on how to shoot professional long term time-lapses? This detailed tutorial by Matt Salter is just a very good start!
Matt – the guy behind this tutorial – is the Marketing and Communications Manager at photoSentinel, an Australian company who make long term time-lapse equipment used by pro photographers all over the world.
Enjoy Matt’s essay, and please have your say by leaving a comment.
DISCOVER MORE ABOUT LONG TERM TIME-LAPSE
Before you start reading this, please note that Matt Salter wrote also an amazing piece of content for Time Lapse Network: 6 Production Tips to Create Professional Long Term Time-Lapse Videos.
What is long term time-lapse?
Long term time-lapse is time-lapse photography captured from a single vantage point over a period of days, months or even years. As the name suggests, it’s simply a time-lapse project that goes for a long time!
Let’s focus on what we’re talking about by watching a couple of long term time-lapses.
Generally, long term time-lapse is used to capture construction projects, but the method has also been used to capture:
- Changing seasons in Forrest Pound’s award-winning Watershed and Samuel Orr’s A Forest Year;
- Changes in river topography in Platte Basin Timelapse; and
- Arctic ice movement as captured by James Balog in a project made famous by the documentary Chasing Ice.
Time study vs true long term time-lapse
A quick clarification: This article looks specifically at long term time-lapse as opposed to time-study.
- The time-study method involves taking short video footage (or time-lapse) from exactly the same position at two or more different times, and then slowly cross-fading between them in post-production to create the appearance of long term time-lapse. Two great examples of this are the BBC’s The British Year and Jamie Scott’s Fall, an incredible time-lapse of changing seasons in Central Park.
- True long term time-lapse involves leaving your camera in one location to take photos at regular intervals for the whole length of the project. By calling it ‘true’ I’m not suggesting that it’s more genuine or more noble than time-study, just that it fits better with the traditional definition of time-lapse. It’s this latter method that’s covered here.
Long term time-lapse: Choosing the Equipment
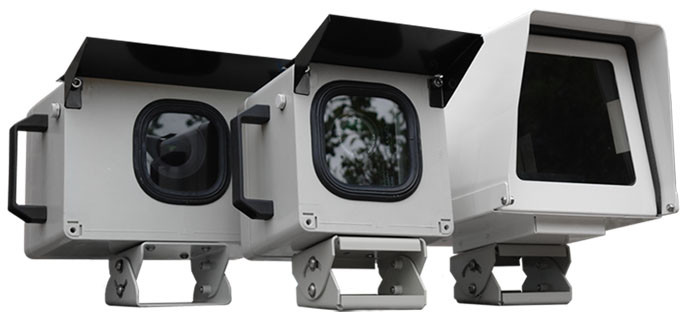
Housing
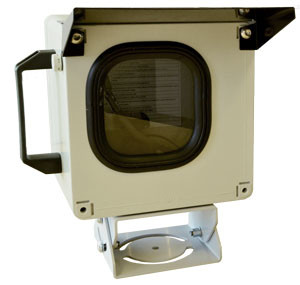 The two most obvious requirements for a time-lapse housing are that it needs to be weather-proof and immovable. So look for something that is fully sealed and secure it firmly.
Other features of a long term time-lapse housing should include:
- Lockable: With either a lock or custom screw/bolt heads – this applies to both the door of the housing and the mounting brackets;
- Dry: It needs to not just be weatherproof, but also free of moisture on the inside – It’s virtually impossible to avoid sealing in some moisture when you close the housing, so throw in some high quality silica gel sachets;
- Adjustable: To ensure the camera is pointing in exactly the right direction;
- Repeatable camera position: If for some reason you have to take the camera out of the housing mid-project, you want a mounting system that allows you to put it back in exactly the same position;
- High quality glass: Our photoSentinel systems use optically pure glass to minimise light refraction; and
- Inconspicuous: It’s probably not a great idea to put branding on it that suggest there’s thousands of dollars worth of equipment inside.*
*Theft is a lot more rare than might be expected. Of over 1500 photoSentinel units installed world-wide, less than a dozen have ever been stolen.
Power
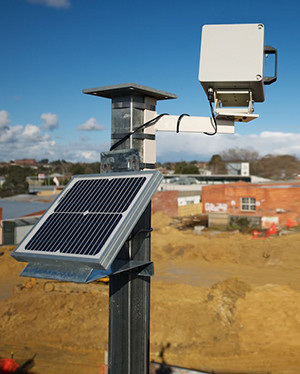 When it comes to power, you really need to know what you’re doing or you’re likely to blow something up. If you’re DIY-ing, this is the one area not to skimp – much better to spend more on a plug-and-play power solution than to kill your camera with a power surge.
- Mains power: If your location allows for it, you can use mains power. But, if you’re not in control of the site, beware that tradesmen sometimes unplug equipment if they need the power point and at other times the whole site may be powered down as part of the construction work.
- Solar: Generally, solar is the best option (you don’t have to run long cables and no one’s going to unplug it) but keep in mind that different systems have different power requirements. If you’re using a computer as your intervalometer, you might need a solar panel as large as 200W. At the other end of the spectrum, the photoSentinel Mini system can run on just a 10W solar panel.
- Rechargeable battery: Don’t power your equipment directly – use the power source to charge a battery pack to in turn power your equipment. This way if the power fails (and Murphy’s law says that the power will fail at some point), the battery will give you a safety net of time to fix the power source while the system keeps taking photos.
Long term time-lapse intervalometer
You have four options when it comes to choosing an intervalometer:
- A normal, battery-powered intervalometer: like you would use for short term time-lapse (make sure you can set session time to infinite and remember that the batteries will eventually run out);
- A computer-based solution: This requires a large, uninterrupted power source;
- A DIY Arduino solution: Or similar DIY platform. Only if you really know your DIY stuff; or
- A custom long term time-lapse intervalometer.
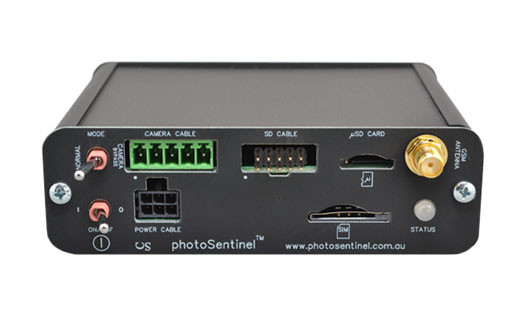
There are a number of reasons to choose a custom intervalometer over the other options.
For example, the photoSentinel Pro controller:
- Operates on very low power (on a normal shooting regime the system can happily run on the lithium-ion battery for a week with no power input);
- Turns the camera off when it’s not taking photos, saving more power;
- Can be set to take photos only during certain times each day and on certain days of the week; and,
- Can receive a change in configuration over the cellular network.
Connectivity
Unless your long term time-lapse setup is somewhere you can keep a constant eye on it, web connectivity is a must. It increases the cost of the project, but the advantages are so great that unless it means your kids are going to starve for week, you really should pay up.
The main benefit of connectivity is that you get more sleep. No, really. One photographer told me he now sleeps better at night because he’s not worrying about whether his time-lapse equipment is still working or not. The status updates tell him his gear is working and he knows that if it stops working, he’ll be alerted to the fact.
There may also be a commercial benefit in that you can offer your clients access to a gallery of the photos.
For construction projects, this can become a project management tool or allow overseas stakeholders to check remotely on their investment. From a business perspective, this allows you to charge a monthly fee for ongoing services instead of just one amount for the final time-lapse edit. I’ve written an ebook about the the business opportunities of long term time-lapse here.
Connectivity may be LAN, Wi-Fi or over the 3G/4G cellular network, and there are different levels of web integration for time-lapse:
- Status updates only: At its most basic level, connectivity means receiving status updates so you know whether your system is still working or not;
- Photo upload: Receive your photos over the web as they are taken;
- Web gallery: Web gallery that lets you and your clients view search, compare and share photos;
- Remote intervalometer configuration: Remotely alter your shooting regime at any time of the project; and
- Remote camera configuration: Remotely change the on-board camera settings.
When looking at different equipment and services, it pays to read the fine print to check what ‘connectivity’ actually means.
For example, some equipment only allows for photo uploading (but not configuration changes or more detailed status info), and some services may not let you shoot and upload more frequently than every 15 minutes.
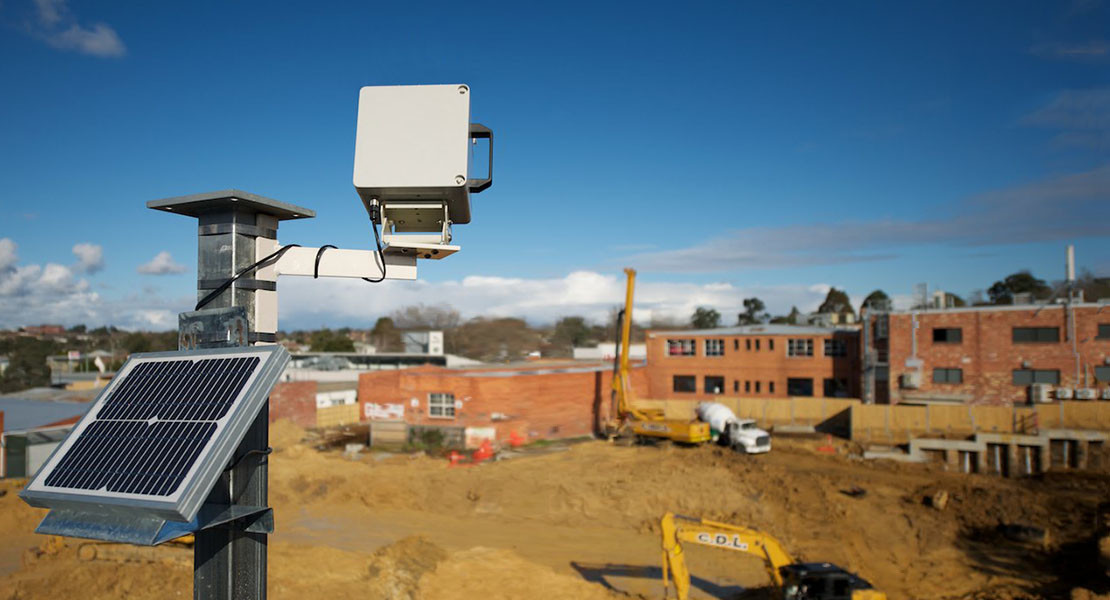
If you’re still not convinced about the advantages of connectivity, let me share two true stories.
- One photographer told me how he had sent his side-kick out to set up a long term time-lapse without any connectivity. Months later, the photographer went to collect the photos from the installation, only to discover that it hadn’t taken a single photo because his assistant hadn’t set it up properly. Heart breaking and costly!
- I know another photographer who set up a photoSentinel unit five hours drive away in another country. After he returned home, he received a status update saying his unit wasn’t taking photos. Annoyed because he thought the equipment must be faulty, he drove five hours back to discover he had forgotten to turn the camera on! Sure, he had his tail between his legs for such a simple mistake, but the connectivity meant he discovered the mistake quickly with no cost to his professional reputation.
Storage
Storage options for long term time-lapse include:
- SD/CF memory cards;
- Computer (if you’re using one as an intervalometer);
- External hard drive; and
- Server (local or in the cloud).
The factors that will influence your choice include:
- Power;
- Connectivity;
- Whether you’re using a computer;
- Photo type (JPEG or raw);
- Photo size; and
- Trigger frequency.
The simplest option is to store your photos the way you normally do – on the memory card/s in the camera. The drawback is that you will have to visit the project site to manually collect the photos, though with a large card you may be able to go for weeks or even months before the card is full. You also run the risk that if your card becomes corrupted mid-project, you may lose all the photos taken up to that point.
If you have AC power and are using a computer to trigger your camera, it makes sense to use the computer to store the photos, either directly or to an external hard drive.
A web-connected system (be it a Window’s computer or a custom controller) allows you to upload your photos to the cloud and to other backup locations. As well as letting you check your photos from anywhere mid-project, you can almost immediately have copies of your photos saved in multiple locations, protecting you if any one level of redundancy fails.
Going with a web option does, of course, cost money for the data, especially if it’s cellular. If you’re shooting raw files, you might want to shoot JPEGs as well and only upload them. If shooting at a high frequency you can often set your system to upload photos less regularly, and collect the rest of the photos manually later.
When using a system without connectivity, it’s vital that you do your calculations to work out how much space your photos are going to take up. Are you taking JPEGs only, raw only or both? Large or small files? A photo every minute or one every hour? Working this out will ensure you plan to collect the photos before the card/hard drive is full.
Camera and lens
Some systems come with the camera already hardwired in, some systems integrate with only one brand and other systems allow you to use your choice from a range of cameras.
If you have to choose your own camera, what should guide your decision?
Elsewhere I’ve written in more detail about why you don’t need a Canon 5D Mark III for long term time-lapse. To summarise, the guiding principle for your decision-making is to remember what you’re using the camera and lens for – long term time-lapse.
This means:
- The camera is going to be locked up in a box for a long period (so you may not want to take your best camera out of circulation);
- The time-lapse footage is going to be compressed down to 1080, or maybe 4K at the largest (so you probably don’t need the highest megapixels you can find); and
- Long term time-lapse often involves shooting something big (e.g. a construction site) from a close-by vantage point (so a wide-angled lens will be more appropriate than a zoom).
Choice of camera and lenses is something we photographers feel passionately about so let me be quick to say that there’s nothing wrong with using a Canon 5D Mark III with an L-series lens for long term time-lapse! If that’s your equipment of choice, go for it! You just don’t have to.
Some of the best long term time-lapse videos I’ve seen were compiled from medium JPEGs shot on a Canon Rebel or entry-level Nikon DSLR.
To summarise, you’ll ideally use at least an entry-level DSLR or fully manual mirror-less camera with a wide lens. I wouldn’t recommend going cheaper than that, though you can certain go upwards!
As with all equipment purchases (or creation, if you’re DIY-ing), the most important thing is to think through what you want to do with it and make your decisions accordingly.
Any questions? Let’s discuss Shooting long term time-lapses!
Should you need more details of want to discuss this tutorial, you may want to leave a comment or get straight to our conversation on “How to shoot a long term time-lapse?” on the Time Lapse Network forum!

