Matt Salter shares his best advice for shooting and editing professional long-term time-lapse videos the right way, and teaches us to avoid the typical errors which you only find out by trial and experience.
Matt is the Marketing and Communications Manager at photoSentinel, whose equipment and software enable professional content creators around the world to grow their businesses by providing long term time-lapse to construction and other big industry.
As with everything in production and post-production, there are countless considerations to shooting and editing long term time-lapse, many of which you can only find out by trial and error.
And, of course, once you start, you’ll develop your own style, your own workflow, your own unique creative signature.
However, there are a few key things that apply across the board, and in this article, I’ll share 6 of them: 3 production tips and 3 post-production tips.
KNOW MORE ABOUT LONG TERM TIME-LAPSEBefore you start reading, please note that Matt Salter wrote also an amazing piece of content for Time Lapse Network dedicated to the topic of How to choose long term time-lapse equipment.
Long-Term & Construction Timelapse: Ten Mistakes Photographers Must Avoid (Bonus Tips)
If you’re new to long-term timelapse or construction timelapse, it’s easy to underestimate what’s involved.
Check this great resource by photoSentinel too, before moving forward with the tutorial:
Long Term Time-Lapse Production Tips
1. Shoot In Aperture Priority
When setting up your camera, use Aperture Priority and lock everything else down in manual.
When you’re shooting long term time-lapse you’re going to experience every lighting condition possible across the days, weeks and years of your sequence, so you need to be on Aperture Priority to let the camera work out how to expose for each shot.
Yes, the flicker is going to be terrible, but with long term time-lapse this is something you have to deal with in post-production, not at the shooting stage.
Lock all your other settings down in manual. For white balance, pick one of the pre-sets; it doesn’t really matter which as long as it’s manual and therefore consistent (I generally choose Fine/Sunny).
The one exception to the ‘everything else in manual’ rule is ISO – for the same reasons as choosing to shoot in Aperture Priority, you might put ISO on auto (if your camera has that option). If, however, your time-lapse includes night shots, it’s better to leave your ISO on manual so you don’t end up with high-ISO noise.
2. Take Lots and Lots of Photos
One of the most common questions we receive is how often to take photos for long term time-lapse.
The short answer is: the more the better. With long term time-lapse, you’re going to capture lots of photos you won’t use in your final sequence, so shoot more, lots more, photos than you think you’ll need.
There will be times when it rains, times when the workers go on strike and there’s no activity, times when all the activity happens inside the building while you’re photographing the outside, and times when something blocks your camera (be it fog, a crane or a spider web).
Some photos in the early morning and late afternoon will have really yellow or blue tints, and long shadows with high contrast will make other photos unusable.

For these reasons and more, you’re going to be culling countless photos in post-production.
With long term time-lapse, you’re looking for the lowest common denominator: good average lighting and colour, and some activity change from photo to photo. And the best chance of getting a sequence of good photos is to take lots of photos to choose from.
As an example, one sequence I edited started off with over four minutes’ worth of photos and, after I culled all the frames that didn’t suit, I was left with about 30 seconds.
In reality, ‘the more the better’ principle needs to be counter-balanced with considerations about:
- storage
- cellular data usage (if uploading photos)
- the amount of work (and processing power) you’re willing to put into post-production.
Taking a photo every minute might help create a smoother time-lapse but, if your project is, as an example, 24 months long, you’ll have a mammoth data bill and end up with over 350,000 photos – that’s over 240 hours of footage – to process.
Taking everything into consideration, one photo every 10-20 minutes is good as a general guideline for most long term projects.
3. Plan For Things To Go Wrong
When planning your long term time-lapse project (or any project, for that matter), plan for things to go wrong.
It’s possible that nothing will go wrong and you’ll never have to visit the equipment to perform maintenance. But, it’s also possible (and these are all real examples) that:
- the electronics will fail
- the window will get dirty
- hail will smash the window
- a spider will build a web over the window
- a crane will knock the unit
- a block of concrete will fall on the unit
- a bird will peck through the power cable
- the unit will get hit by lightning
- the equipment will get stolen by angry workmen who think you’re spying on them.

Here are two ways to plan for things to go wrong:
- Firstly, wherever possible, install the equipment in an easy-to-access and cheap-to-access location, for example the roof top of an adjacent building or low enough up a pole so as to be accessible by ladder.
The cost of maintenance visits on projects that require an Elevated Work Platform (EWP) to access will add up quickly.
- Secondly, include regular maintenance visits (one every 2-3 months) in your project budget.
If you need an EWP, include the cost of that (the construction company may already have one onsite you can use for free), and also budget plenty of time as there’s often a lot of waiting for access on building sites.
You may not need to perform maintenance, but if you do, at least you have already financially planned for it.
Long Term Time-Lapse Post-Production Tips
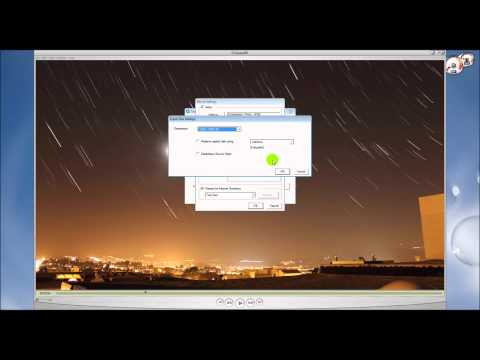
1. Use LRTimelapse to fix time-lapse flickering
The main enemy of long term time-lapse post-production is flicker.
But, I’m not talking about the minor aperture flicker you’re used to if you shoot short term time-lapse. I’m talking about huge variations in lighting from one photo to the next, the kind of flicker that puts 80s disco strobe lights to shame.
LRTimelapse is specifically designed to help balance and smooth out flicker in time-lapse sequences by adjusting the exposure settings of each photo in relation to the others.
While originally designed for short term sequences, it can be used for long term time-lapse as well. Developer Gunther Wegner has filmed a video tutorial on how to use LRTimelapse for long term time-lapse.
You can download and run the evaluation version for free and the full version is well worth the price tag.
2. Frame Blend
In addition to flicker caused by changes in light, long term time-lapses also produce what I call ‘object flicker’. This is where an object, such as a cloud, truck or person is in one photo and not the next, ‘jumping’ in and out of the sequence and causing a staccato effect.
The aim when editing long term time-lapse is to draw the viewer’s eye to the main subject undergoing change (usually a building being constructed) and object flicker is a big distraction that can make a sequence almost unwatchable.
The best way to combat object flicker is by frame blending, where each frame is blended with a ‘ghost’ of one or more of the frames before and/or after it. This results in objects fading in and out of the video, creating a smoother, flowing feel instead of the jarring nature of object flicker.
If using LRTimelapse, you can add this effect at the render stage by selecting “LRT Motion Blur Plus”. There are three levels of motion blur, so you’ll need to render multiple times at different levels to find the one that works best for your sequence.
Alternatively, if using After Effects to edit and render your sequence (I export the individual images at the end of the LRTimelapse workflow and then import them as a sequence into After Effects for further editing), you can use the CC Wide Time effect, which allows you to set the number of frames before and after that you want to blend. The advantage of doing it in After Effects is you can preview your settings in the edit timeline, rather than having to render it out to see what it looks like.
Here’s a great example of frame blending to minimise object flicker. Notice how trucks, diggers, etc. ghost in and out creating a smoother feel.
One last final tip on helping to reduce light and object flicker is to vignette your image by blurring and/or darkening the edges.
This is particularly effective in lessening the flicker caused by changing sky on the edge of the screen, and helps to pull the viewer’s gaze to the central subject. It doesn’t work for all sequences, but is worth experimenting with.
3. Get Creative!
Let’s be honest, no matter how well you shoot and edit your long term time-lapse sequence, a full two minute time-lapse from just one vantage point is not going to be the most engaging thing you’ve ever watched. So, you need to be creative and make it engaging.
The best thing you can do for engagement is to supplement the long term time-lapse with other footage – short term time-lapse, video, interviews, aerial footage.
But, if you have only the long term time-lapse footage to work with, there are two things that can help significantly in making it more engaging: dynamic movement and motion graphics.
Add in some dynamic movement to your sequence – zoom, pan, tilt. Your photos will be way more than 1080 resolution, so you should have plenty of pixels to do this without losing quality (you may be more restricted if you need to render in 4K). You can add movement by simply playing with the scale and position of the sequence, or you can get a bit more sophisticated and add perspective correction so it looks like the camera itself is moving through space. To add perspective correction, you can use software like Panolapse to do the hard work, or you can put the effort into experimenting with 3D camera motion in After Effects.
This long term sequence of snow arriving at The Remarkables is a great example of dynamic movement with perspective correction that makes a static camera look like it’s on a vertical slider. It was shot and edited by Diaries Downunder, in partnership with photoSentinel, for an AirNZ campaign.
For the full video and behind the scenes, click here.
The second tip for helping to keep engagement is to add in some motion graphics about the project.
You could include information about the history of the site, the size, weight and amount of materials used, number of man-hours invested, the duration of the project and significant milestones. I’ve written more on using motion graphics in time-lapse here.
Now six years old, the video below remains one of the best and most engaging single-POV long term time-lapse edits I’ve seen, particularly for its use of motion graphics to augment the story-telling of the time-lapse sequence. (Notice also how the vignetting works to lessen the flicker of the sky.)
Conclusion
Follow these six tips and you’ll be well on your way to making great long term time-lapse!
What are your tips for shooting and editing long term time-lapse? Post them in the comments below.
For more tips and case studies on long term time-lapse, check out:
- How to choose long term time-lapse equipment
- How to use motion graphics in time-lapse
- What camera should you use for long term time-lapse?
- photoSentinel stars in Air New Zealand’s winter marketing campaign
- photoSentinel captures rebuilding of hospital after Nepal earthquake
- photoSentinel captures the construction of Red Bull Crashed Ice Course