The following tutorial will show you the basics to learn how to create a drive lapse sequence from your car.
How to make a Drive-Lapse
A couple of years ago I happened to watch a video on YouTube of two American boys who went around in the neighborhood of Beverly Hills. On their car dashboard they fixed a camera that was shooting a timelapse. The making of was a bit rough, but that's when I thought: I'm gonna make it on my oen.
It was very fun to watch the roads and the scenery scroll quickly, even if the movie was based on frames captured too quickly, with too fast shutter speeds that made all seem jerky.
So I started thinking about how it was possible to adapt and improve the idea.
How to create a drive lapse
The shutter speed
Shooting using classical shutter speeds of 1/200 during the day will make your sequence anything but pleasant, because a timelapse from a moving car is very different from a movie of clouds rushing over a lake. In your car everything is in always in fast motion: the road, objects (cars, lamp posts, buildings, etc).
To have a "speed effect", paradoxically, it is necessary to lengthen the shutter speed.
After a few tests, I noticed immediately that a shutter speed of 0.8 seconds was ideal. Why this value?
My Aputure intervalometer has a minimum interval between shots of 1 second. To take the maximum amount of frames it was necessary to set this interval, not to lose the feeling of "fluid speed". The 0.8 seconds shutter speed seemed perfect with the daylight.
As setting the aperture to f/22 and the ISO level to 100 can hardly make it easy to operate without a heavy overexposure, I bought a ND filter 77mm to "absorb" 4-stop. The exposure problem was solved.
Despite this, I did not like the effect of the time lapse during the day at all. The objects and the way had motion blur, but it was all too confusing. On the other hand, during night with a completely different lighting, the situation changed radically, and it seemed to return some sort of "warp" effect, the type of speed warp of the spaceship from Star Trek!
Even when driving 50 km/h it seems to travel much more quickly, the game was done, the idea of night worked as I liked it!
Drive-Lapse: Setting the focus
The focus point should be set to the infinity, pointing the road itself using a wide angle lens.
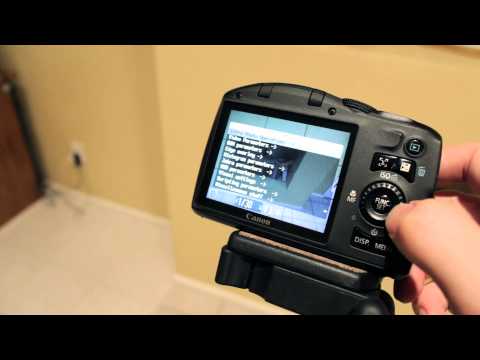
A quick trivial, as often the notch on the lens does not match its own infinity (for various reasons), I am used to set the AF on my Canon to "One Shot, midpoint". From inside the car I press the shutter button halfway in order to make it immediately set on the road. Right after that, I turn off the AF.
Never use the auto focus during the time lapse shooting phase: the continuously changing scene will make the focusing system go crazy. In addition, as there are so many shots to grab for a drive lapse, disabling the AF will save precious battery.
Drive-Lapse best exposure
And for the exposure? I personally prefer the partial exposure, or the spot. Be sure to avoid the evaluative focusing which takes into account the entire area of the frame. In fact, the inside of the car is much darker than the outside because dashboards are typically black, gray, etc. . and during night, the light meter would expose the dashboard properly while burning almost the whole road!
Using the partial exposure, the spot covers only 9% of the frame and focuses only on the center of the road, and can slightly overexpose the rest.
Setting the right White Balance
Regarding to the white balance, during nights you should typically set the WB to "tungsten", which is the most suitable for street lighting which turns to yellow/orange. I do not recommend to use the automatic white balance because it would vary continuously from one shoot, to another.
Shooting Modes
Shooting JPEGs at the lowest resolution, is more than enough for the creation of a Full HD video. It makes no sense to load thousands of RAW of the street in motion.
Set your camera to Tv mode - shutter speed priority, automatic ISO (leaving Iso 1600 could overexpose often, vice versa, leaving ISO 400 could cause frequent underexposure). And then still better to rely on a more automatic, the automatic ISO, which in the recent Canon EOS ranges from 100 to 6,400.
How to Place the Camera in Drive-Lapse
When I took the Canon 40D body was bigger and would not fit under the headrest. Then I began to think of something that could be fixed permanently, but that could be dismantled easily. With the car of a dear friend of my father, we dismantled an inexpensive photographic tripod.

The idea was great, because the "tool" could be assembled and disassembled by simply removing the front head restraints and locked by inserting just above the headrest.

In addition, the bottom bracket was pressing on the arm receiving great stability. The icing on the cake, tilting the head will allow you to adjust the picture as desired:

Choosing the best lens for Drive-Lapse
In my opinion, the most appropriate lens for this shot is a strong wide lens. In my case the Canon 10-22mm f/3.5-4.5 USM is capable of embracing the whole area that goes from the left mirror to the right one.
You can use many other lenses, the important thing is that you can grab both the road and the dashboard, with those various indicators of the instrumentation that run much faster than normal!
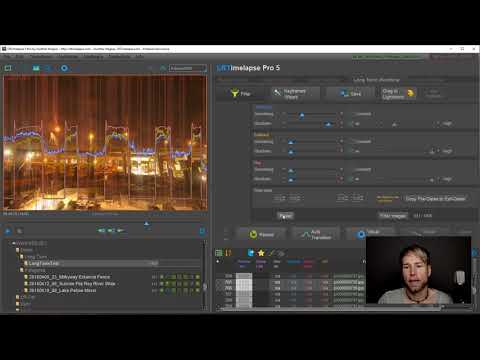
Final video assembly
For all the time lapse that I did use the free software VirtualDub. It's very simple: just load the first frame (making sure to save in growing order number) and immediately the program generates the movie.
The base speed is 10 frames per second, which is usually straight edge between 15 and 20. Finally compress in divx format. Then you can make cuts and simple editing with Virtual-dub, even if the ideal software is Adobe Premiere with which it is possible to realise a huge number of high-quality effects.
To take into account that for a time lapse of the kind the number of shots to be handled is enormous: 1 shot per second + 1 second interval = 30 shots per minute = 1,800 shots in one hour!
As a practical advice I have to say that it is better to operate in low light at sunset or even better at night, to have the effect of trail pronounced by artificial lighting at night. If your able, it is best to prefer straight roads: I do not know you can achieve that, you but I get an effect of sickness in these movies!
The drive lapse done: Video
The following is a demonstration video created specifically for this article, created with my Canon 40D and a Canon 10-22mm f/3.5-4.5 USM. Almost an hour of driving, following the methods outlined in my article. I tried to capture more cabin possible to show the effects of the lights also inside the car, rather than concentrate everything on the road:
Please note that this article is a Italian to English translation of the original tutorial available on Time Lapse Italia, written by Guido di Vincenzo.