- 157SHARES
- Facebook0
- Twitter157
- LinkedIn0
- Reddit0
- Pinterest0
- Digg0
Photographer Oliver KMIA, specialized in aerial videography, time-lapse and hyper-lapse video productions reviews his Dynamic Perception Stage One and Stage R Review, and shares his thoughts with us.
Before proceeding, let’s watch some great videos of his!!!
Oliver KMIA’s 2015 Highlights
and now, let’s get into it!!
Dynamic Perception Stage One and Stage R – Product Review – by Oliver Kmia
Only 5 or 6 years ago, there was simply no ready to go options for timelapse slider and pan-tilt system. My fellow timelapsers had to install low RPM motors on a regular video slider, make it stable for long shutter speed, modify expensive astro tracking device and figure out a way to make them work all together. Synchronizing the system with the camera was also a challenging and tedious task that had to be done manually following a precise order.
So when Dynamic Perception first came out with the Stage zero and the MX controller, the success was immediate. This system was built for timelapse by a timelapser and included a controller that could synchronize every step of the process: moving the rig and trigger the camera in a coordinated fashion.
The stage zero was Dynamic Perception’s first slider along with the MX2 controller. It quickly became a hit and the company introduced new gears for the timelapsers. Later on, DP released a collapsible carbon fiber slider, the Stage One and Pan-Tilt system, the Stage R.
Early 2015, I finally decided to order the full Stage One and Stage R bundle. Note that I paid my system full price, like everybody else and I have no affiliation whatsoever with Dynamic Perception.
1. Product version and review
Dynamic Perception offers four main products bundled in kits with all the necessary accessories included (hardware, cables, battery, tools,etc.):
- The Stage zero: a fixed, 2 meters / 6 feet long aluminum slider. The length is not extendable
- The Stage One: a modular carbon fiber slider where the carbon rails can be joined to extend the slider length based on the user needs
- The Stage One 4 all: the budget declination of the Stage one. The carbon fiber rail is replaced by a cheaper one meter (40”) aluminum rail. In this version, the rails are not joinable.
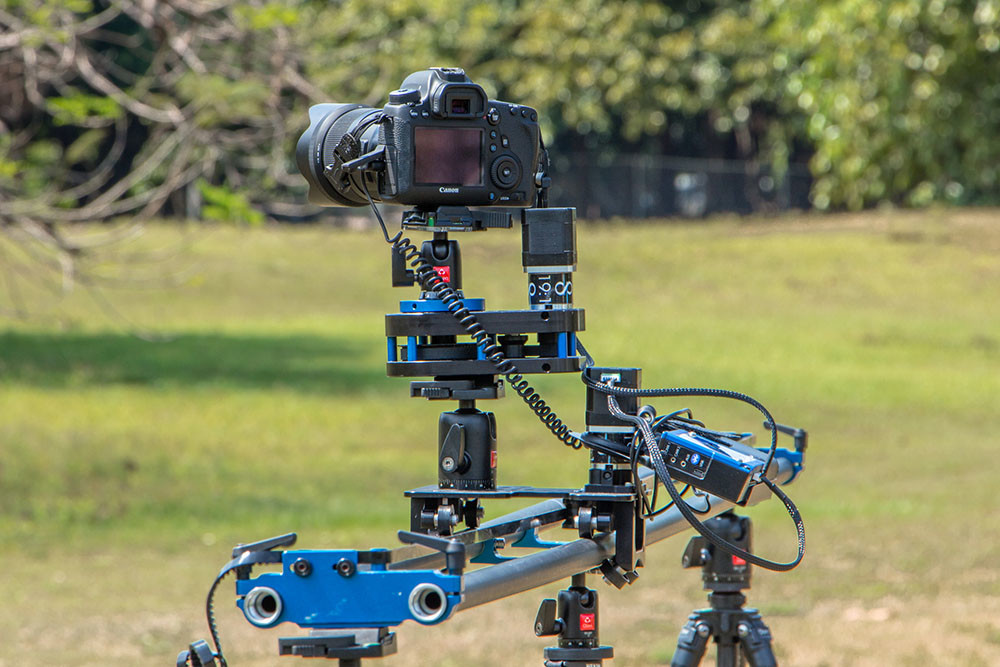
- The Stage R which is the Pan & Tilt device. Each axis can be mounted independently or all together to form a 3 axis motion rig with the sliders.
- The NMX digital controller is the brain, user interface and power distribution of the system. This little box sits between the battery and the motors. It receives inputs from the user via an IOS or Android app, the orders are then transmitted over via Bluetooth to the NMX controller which translate them into a synchronized motion and camera triggering sequence.
At the time of my order, the Stage One 4 All was not available and the Stage zero – with its fixed 2 meters (6 feet) length – was not very practical for me so I decided to go for the modular Stage One slider and Stage R pan and tilt system. Here is what I’m going to review today:
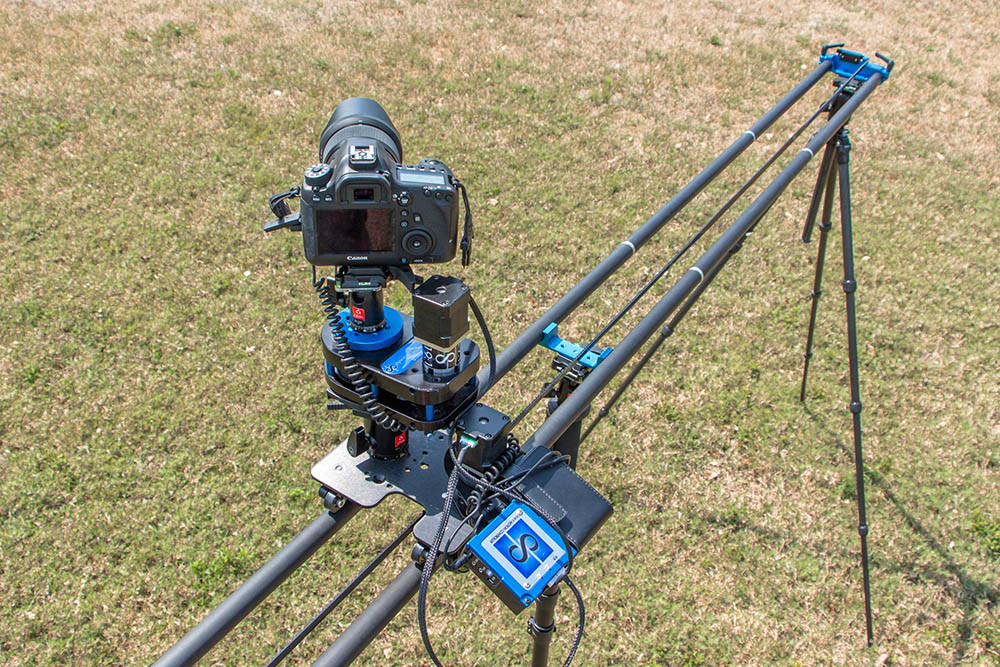
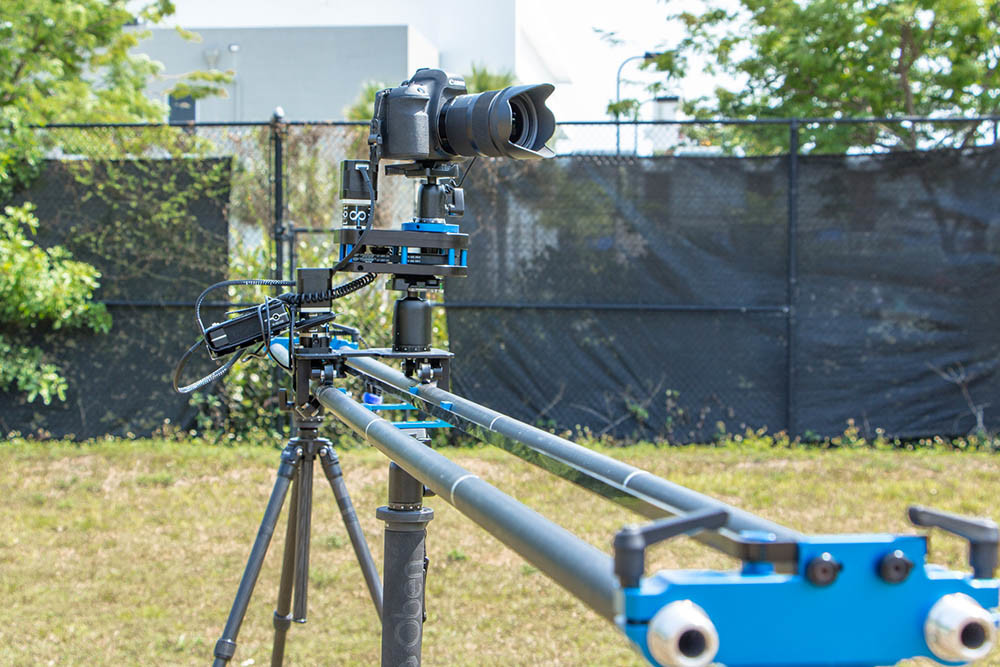
- The Stage One slider
- The Stage R pan and tilt system
- The NMX wireless digital controller
Note that since my order a year ago, Dynamic Perception released some new products for this kit (NMX PRO & Stage One PLUS). These products don’t really change the main functionalities and features of the kit, they are just nice updates that improve the overall packages. More about that in a moment.
2. Content of the kit and Build quality
I wish every company could meet the standards of dynamic perception. After unboxing and assembling my kit for the first time, I was impressed by the build quality and feel that comes from this product.
First, the kit includes all the parts and tools necessary to setup the system. Everything fits together nicely without any play and the constructions seems extremely solid.
The Stage R is literally built like a tank and it will take a lot of mistreatment without problem.
According to Dynamic Perception, the products are designed and made in Michigan following tight production and quality control procedures. Some of the manufacturing steps are similar to the one used in the aerospace industry. All I can say is that after using and mistreating my kit for a year, I never experienced any issues with this system. It does deliver, always.
3. Instructions, Setup and Usability
Building the system for the first time is very straight forward and requires very little assembly. If I remember correctly, I had to screw a few pieces together, that’s all (remember that all the tools are included in the kit). The online manual and tutorial videos are very well made and I was able to shoot my first timelapse just two hours after receiving my kit.
Past the first assembly, it usually takes me way more time to frame the composition and find the right angle than to setup the system. Let’s analyze each part one by one:
- Stage one: Using the Stage one is very simple: connect the rails together, tighten the belt, attach the camera and level the rig. It’s a matter of 5-10 minutes for a cold start, then I usually carry the rig around with everything connected.
- Stage R: As for the Stage R (Pan & Tilt) there is nothing to assemble except for the dual axis setup. The user will have to attach two hex screws between the Pan and Tilt section. The core of the stage R can be used for one axis motion, pan OR tilt, or combined together with a L bracket to give pan AND tilt capability. The stage R can also be mounted on the Stage One slider to achieve 2 or 3 axis motion.
- NMX Controller: The NMX controller is a little box that receive input from the NMX motion App (IOS or Droid). The Bluetooth connection allows to control the systems wirelessly. The controller commands the motors and supply power to the system via a little battery. No matter how many axis are used, only one battery and one NMX controller is required.
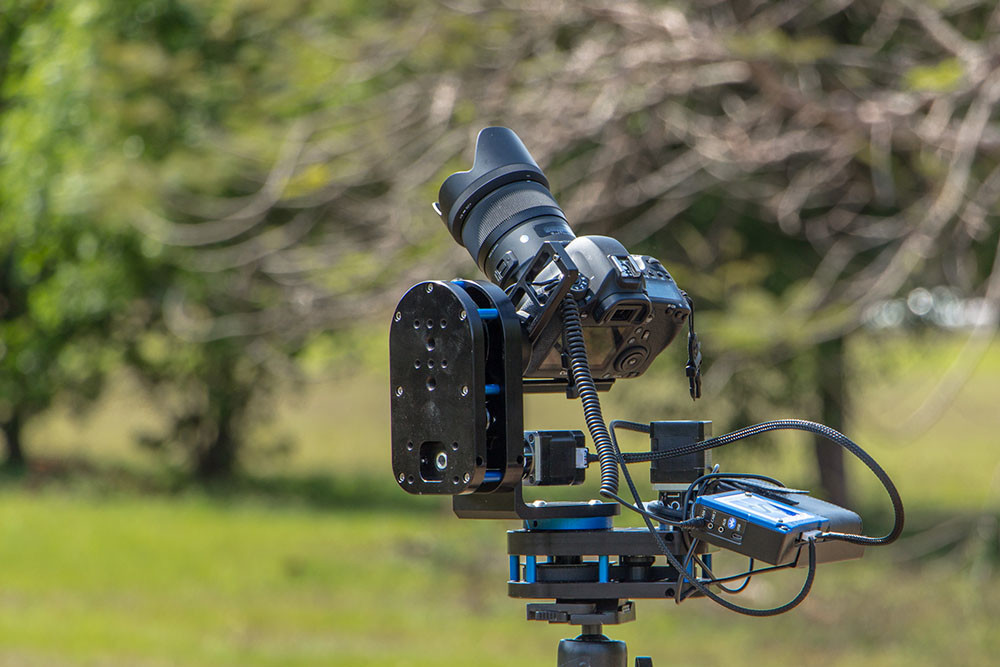
The Stage R Pan & Tilt system. Each Stage R axis is identical. Mount the two together with an L bracket to create a Pan & Tilt device. The Stage R can be attached on the Stage One slider. The slider and Stage R use the same type of motor (19:1 stepper motors). The NMX controller can control 3 axis and trigger 3 camera simultaneously.
4. Controlling the system via the application
The NMX controller is piloted via the IOS and Droid App (NMX Motion) or with the help of a dedicated computer software (Graffik) for more advanced features.
The first steps is to move the camera (slider, pan , tilt) with the virtual joystick on the App in order to reach the desired position and framing. The next step is to enter a start point then move the rig to the final position and assign this position as the end point. The controller now know which position is the beginning and the end. In fact, this procedure consist to enter an In and Out keyframe.
Then the user must enter the exposure time (shutter speed) and select the total time of the sequence. The App also offer to select different settings such as the number of picture or the total duration of the sequence and will calculate the other parameters automatically. The whole experience is very simple and intuitive.
For more complex scenario, the app proposes an “advanced settings “ tab where the user can dial specific values such as the shutter release time (useful for HDR), the focus and buffer delay etc..
Last, the App proposes a ramping option to start a sequence slowly, accelerate in the middle, slow down at the end or none of that. The ramping can be programed at will.
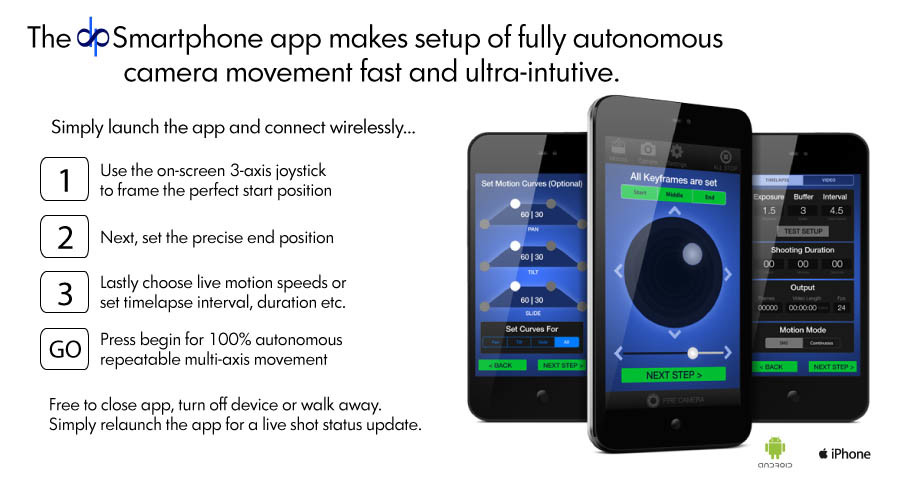
The NMX Motion is available for free on the Apple and Google Stores
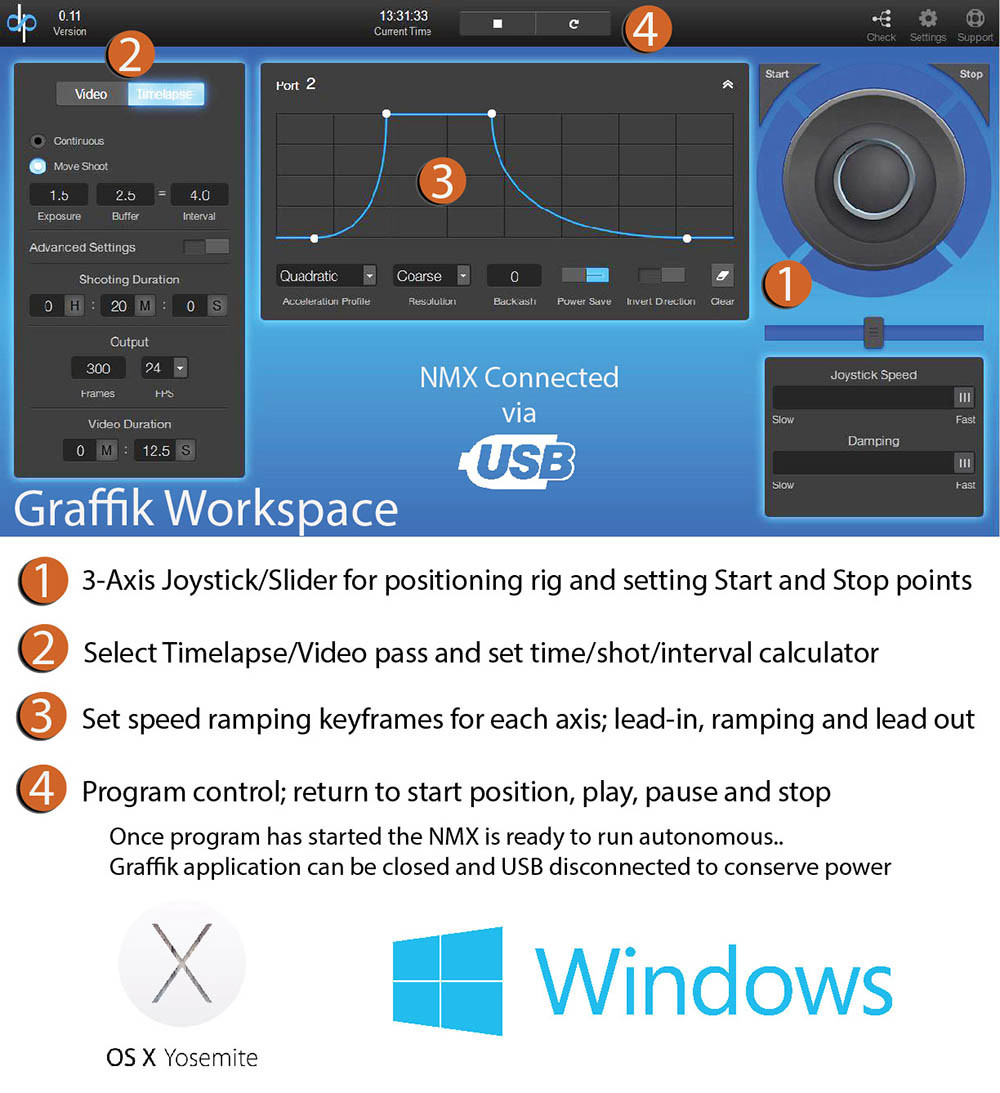
For very advanced motion, the system can be piloted directly via a laptop with the help of the Graffik Software.
5. Features and Specs
This combo is packed with features and can do a lot of motions. Unlike other system that struggle with vertical loads, the Dynamic Perception slider and tilt axis are not afraid of vertical lift or tilt up to 20 pounds / 9kg. They are capable of moving even greater load (40 pounds +) on the horizontal axis.
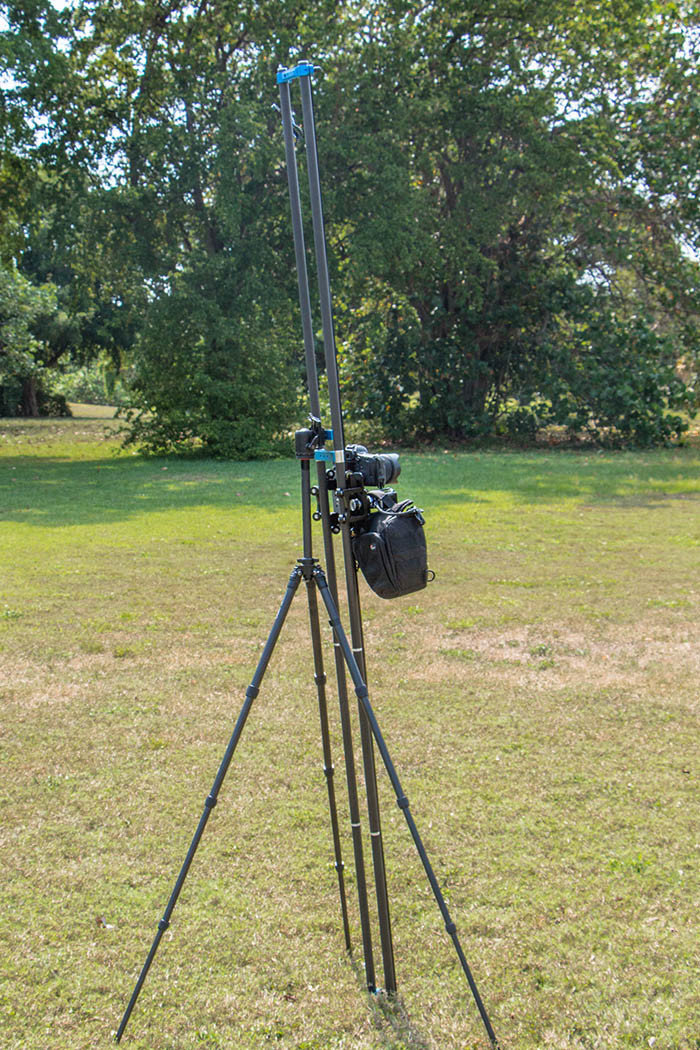
The Stage One slider can lift up to 20lbs / 9kg on a vertical axis. Dynamic perception products can handle very heavy loads in any direction.
Here is an incomplete list of the possible options:
- Underslung capability: the camera move below the rail
- Reversed or Push/Pull slider: attach the Cart to the tripod and the slider moves with a camera at the end. This feature allows to shoot a sequence without having the slider in the field of view.
- Rotating slider for arc timelapse: same as reversed slider but with the addition of a Stage R to add a rotation effect
6. Modularity, Versatility and compatibility
The system is design in modules. The stage one slider can be used for one axis motion, same for the Stage R but they can also be combined to offer 3 axis motions (slider, Pan & Tilt). Each axis is controlled by the same NMX controller that can control and trigger up to 3 camera and axis at the same time.
Some parts such as the motors are similar for the slider and Pan-Tilt. I often only carry one motor when traveling and use it alternatively on my slider or pan-tilt device. This way I can save weight and space.
I often “trick” my controller and Stage R to perform dual timelapse. While one stage R axis does a Pan with Camera A, the other Stage R does a tilt with Camera B. Or I can do two pan motion with two camera at different focal length.
The slider can be broken into 20 inches (50 cm) sections that can be combined without any limits to build an extra-long slider. In real life however, I found it hard to correctly balance and align the slider beyond 6 feet/2m section. After this length, extra care must be taken to maintain the slider leveled. Dynamic Perception also recommends using support points for every 3feet /1m of slider (a monopod works). This is especially true for heavy loads and use in conjunction with the Stage R. However light loads can do without support in my experience. (ie. a Canon 6D with 24-70 is light for the Stage One)
Another interesting feature is the possibility to connect external accessories and parts from different brands such as Ramper Pro or eMotimo. The NMX controller is networkable for expandable via MoCoBus control.
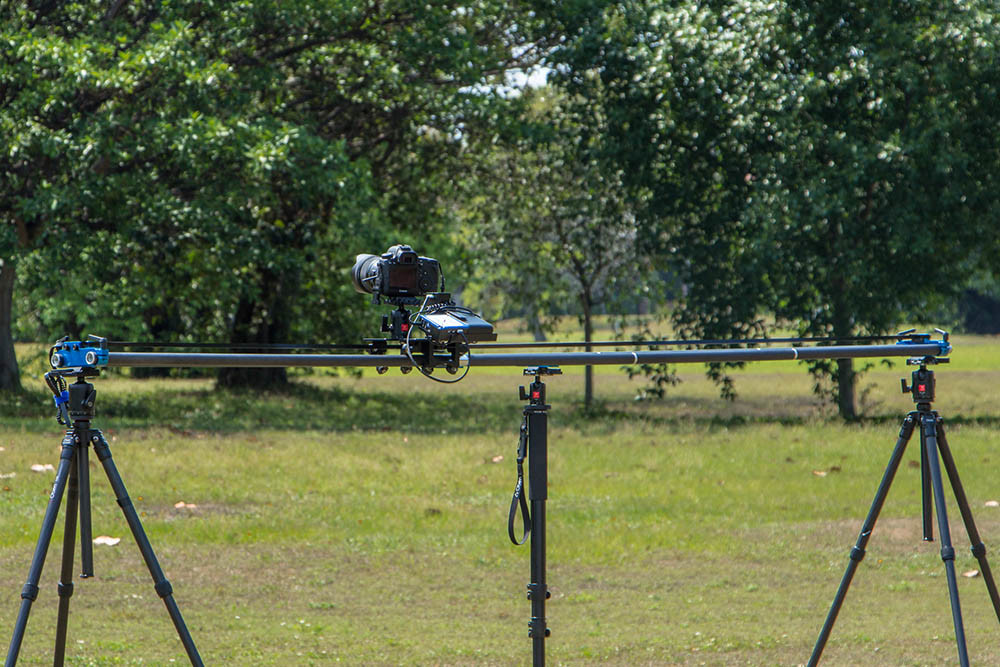
The Stage One length can be extended at will. Here is an example with a 40” rail and 3x 20” rails for a total of 100” (2.5 meters). The slider should be supported every 3 or 4 feet. That kind of setup requires careful leveling to avoid unwanted motion.
7. Weight and portability
While the slider bundle is remarkably light and portable, the Stage R won’t go unnoticed in your bag.
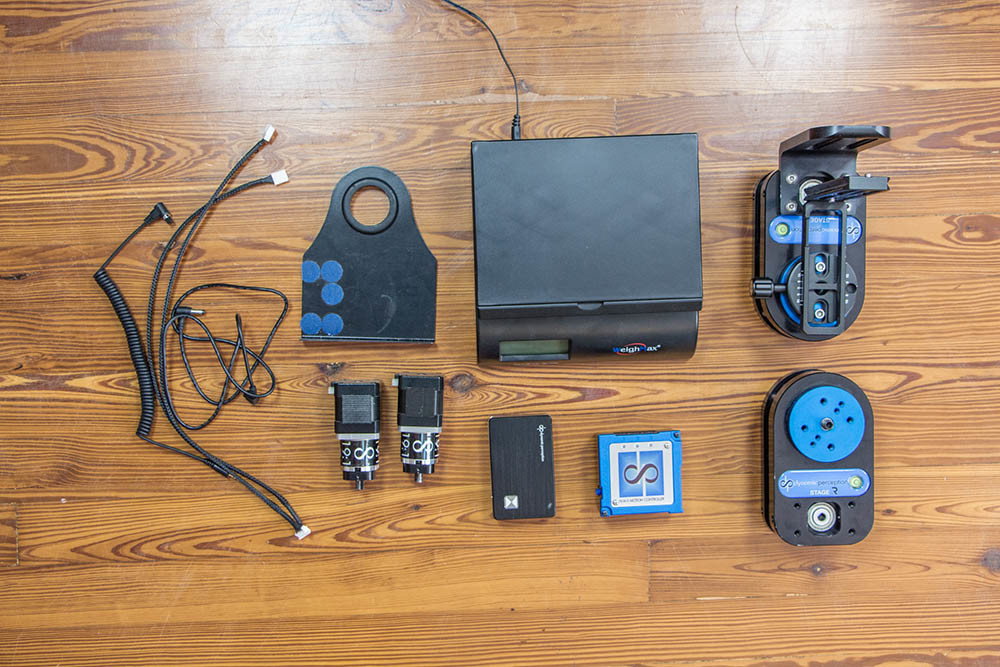
Here is the weight as checked on my scale:
| A Motor (19:1) | 535 g / 1.18 lbs |
| Stage R unit single axis (no motor) | 855 g / 1.88 lbs |
| Stage R Pan & Tilt (no motors) | 2180 g / 4.8 lbs |
| A set of 20”(50cm) rail | 260 g / 0.57 lbs |
| Stage One Slider cart & End caps (no motor) | 1480 g / 3.26 lbs
Note: the new Stage One plus is 450 g / 1 lbs lighter than my version here |
| NMX Controller plus battery and cables | 420 g / 0.92 lbs |
So for a fully functional 40” / 1 meter Stage One slider the weight is 2955 grams or 3 kg (6.5 pounds) which is very good in my opinion. Each additional 20” /50 cm rail section will only add 260 g / 0.57 lbs.
On the other side, the Stage R is quite heavy. A ready to use single axis (pan or tilt) weights 1.8 kg / 4 lbs. Combine the two axis and it jumps to 3.7 kg / 8 lbs.
The main issue here is to balance this load while using the slider and the Stage R together. With the dual axis Stage R, a head, plus a camera and lens, the slider has to carry up to 4 or 5 kg. (the slider can handle up to 9kg / 20 lbs on vertical load).
With such weight, leveling the system becomes critical since the tripod and rail can flex during the motion leading to unwanted effect during the sequence.
In my case I rarely use the slider and two axis Stage R at the same time. The sliding and pan motion is usually enough. Crazy multi-axis sequences are fun but don’t add much artistic value in my opinion. I actually now only use one axis motion for most of my timelapse.
As for portability, the whole system can easily fit in a carry on case. I like to travel light and portability is a must for me.
I usually take the following items while traveling:
- 1.5 meters (60”) Stage one Slider with 3 set of 50 cm / 20” carbon rail
- One Stage R axis
- One motor for the slider or the Pan-Tilt axis
- The NMX controller and battery
With this 4.1 kg / 9 lbs system I’m able to cover most of the moves except the most complex Pan & tilt motions that I almost never use in real life especially since I have a super wide 14mm Samyang lens.
I think the weight is very reasonable for a full systems with a 1.5 meter / 60” slider and pan-tilt axis. Last, the controller battery comes with an USB out port that can power other devices such as tablets or smartphones. Nice feature.
8. Price and Value
Since I purchased my Stage One last year, Dynamic Perception introduced a new version called Stage One Plus that fixed little issues, reduced the weight of the slider by 450 g / 1 lbs and improved the overall slider stability. This standard version is available as a full ready to shoot bundle for U$D 1,375 with two 20” rail sets for a total length of 1 meter / 40” .
This set contains the NMX controller that also controls the Stage R. This one cost U$D 795 as a standalone with the NMX or U$D 495 without. Dynamic Perception also proposes cheaper alternative such as the Stage One 4 All at U$D 995
The prices are consistent with the competition but I decided to buy the dynamic perception because of the unique features and the strong reputation this system has in the timelapse community. For instance, the House of Cards timelapse opening was filmed by Drew Geraci using a dynamic perception slider.
9. Pros & Cons
Pros
- Aerospace grade build quality (made in USA)
- Very sturdy system
- Compatible with the vast majority of camera on the market
- Easy to setup
- Wireless digital controller that works on Bluetooth and can be controller with any IOS or Droid device
- Intuitive and powerful App with advanced features such as motion ramping, keyframe, etc
- Tools included in the kit
- Ability to simultaneously controls up to 3 axis and trigger 3 camera
- The system battery can also be used to charge other devices via the USB out port
- Excellent and responsive customer service
- Compatibility with other systems and communication protocol (MocomBus) such as emotino, Ramper Pro, etc.
- Extendable slider length (Stage One), from 20” (50cm) up to infinity! Rails are available in 20, 40 and 60 inchs sections.
- Travel friendly: lightweight and compact slider (Stage One) that fits in a carry on case.
- Modularity of the system, can be set as a simple one or tree axis motion rig, Pan, tilt, slider or a combination of the tree (plus the ability to do push/pull and arcs)
- Reliability: once the system is fired, nothing will stop it (dead phone, App crash, etc.)
Cons
- Weight of the Stage R Pan and Tilt system: heavy system but heavy duty as well. Can do 40 lbs / 20 kg + on the Pan axis and 20 lbs / 9kg on the tilt axis with the standard 19:1 motors (probably more with lower stepper motors).
- A few ergonomic issues such as the LED on the controller that can’t be turned off (I just tape them off during starlapse). The Stage R requires two screws assembly to do Pan and Tilt, however the single axis doesn’t requires screws. The rest of the “issues” have been handled by Dynamic Perception with its latest updates (Stage One Plus and NMX Pro)
- The solution to mount the controller and battery is not very integrated. A simple plate holds everything which is not very practical for vertical motion on the slider.
- Leveling the slider can be challenging on long length (6 feet / 2m +) but this issue is common to most sliders due to the flexibility and weight shift during motion.
10. Conclusion
The Dynamic Perception Stage One Slider and Stage R Pan-Tilt systems are very good products that perform extremely well. Thanks to their robust design, these devices are not afraid to move very heavy camera and lenses in any direction: up and down, underslung, push/pull, rotation, etc. while some competitors struggle to handle other than medium sized camera and perform poorly on the up/down or tilt motion. The rigidity of the carbons tubes also permits to do “over the ground” sequence where one part of the slider is placed over the scenery (ie. shooting the street below from a balcony)
Despite its performance, the Stage One slider is surprisingly light thanks to the carbon rails. On the other hand, the Stage R Pan-Tilt is on the heavy side but can lift massive loads and handle strong winds without negative consequence for the final sequence.
In terms of ergonomics, DP made the choice of modularity which can create a bit of cable mess from time to time and requires a few minutes for cold start. I also find the integration of the controller and battery to be a little bit primitive as they just sit on a plate and must be attached with Velcro or other means. However this design allows endless creative options and easy integration with other products such as eMotimo or Ramper Pro. In this regards, DP provide a future proof systems with an universal communication protocol.
The modularity also means that the different parts won’t become obsolete as a soon as the latest upgrade shows up. Last, the slider can virtually reach an infinite length with the extendable rails even though this feature doesn’t prove very practical past 6-9 feet / 2-3 meters due to the need of leveling all the system.
As for the software interface, I can’t find anything to say. The apps offers a great variety of controls and settings without being complicated. The menu are intuitive and a sequence can be programmed quickly with motion ramping and keyframes if needed.
Overall, the system is very reliable, a critical point for timelapse when re-shooting a sequence is not an option. Yes, the App does crash from time to time but never during a sequence. Once the rig is programmed and fired, the controller becomes the master unit and will not be affected by whatever happen to the smartphone. The App can crash, the phone can be killed but the controller will maintain the sequence on track and even resend the correct settings to the phone after restarting the App. After shooting hundreds of timelapses with this system I never experienced a single failure.
Unfortunately I do not have much in depth experience with other sliders to do a fair comparison but I’m personally very satisfied with this purchase. It’s easy to use, it’s reliable, it delivers and I can put a 6 feets / 2 meters slider in my carry on bag. In terms of price, the whole set will cost between $1000 and $2500 depending of the options. That’s the price of a quality lens or entry level full frame camera. It’s not cheap but that kind of product doesn’t get old nor need to be replaced every few years.
Finally, Dynamic Perception offers excellent customer service and its CEO, Jay Burlage is always present on the Forums and Facebook groups to offer his assistance on top of the regular helpdesk of the manufacturer’s website.
Watch my latest videos done using the Dynamic Perception products
Puerto Rico
New York
Credits
@oliverkmia
Vimeo: https://vimeo.com/oliverkmia
FB: https://www.facebook.com/Oliver-KMIA-1622032868057530/
Instagram: https://www.instagram.com/oliverkmia/
Twitter: https://www.instagram.com/oliverkmia/


