
Learn the basic workflow for time-lapse processing directly from Gunther Wegner, author of the worldwide known software for time-lapse sequences deflickering LRTimelapse.
 Let’s then have a look at what you need to do to create a flickering-free time lapse video, starting from the basics: Importing, Keyframing and Rendering RAW-files or JPGs time lapse sequences.
This tutorial is an excerpt of Gunther Wegner’s must have E-Book Time Lapse Shooting and Processing and will introduce you to the basics of editing time lapse sequences using the power of the Adobe Raw Converter found in Lightroom combined with the keyframing abilities of LRTimelapse.
LRTimelapse Video Tutorials
Want to learn LRTimelapse even faster? Then you must be checking our post LRTimelapse 4 Video Tutorials: the Basics, Holy Grail and Motion Blur Plus.
Let’s get started!
Hey guys!
This tutorial is now out of date, as it is based on the LRTimelapse 3 version. If you’re looking for something new, please head to the new Basic Workflow for time lapse processing with LRTimelapse 4 – 2015 Tutorial.
Download and Installation of LRTimelapse
Once you’re ready to start, the very first thing to do is to navigate to LRTimelapse.com where you’ll download the program, available from the site as a free test version and then continue on to the installation process. There is a Windows version and a Mac version.
- On Windows: The Windows version is installed with a simple double-click on the installer-file, which will initiate the automatic installation of all components. Please make sure that you have an up-to-date version of Java, preferably the 64bit version, already installed. It’s available under the following link: http://www.java.com/en/download/manual.jsp (please uninstall all previous versions of Java beforehand).
- On a Mac: Open the downloaded DMG file. First off, double-click on “LRTimelapse Add-ons,” to the left, and follow the installation program’s instructions. The very first time you might have to right-click on to the icon and then choose “open” to be able to agree once to the gate keepers warning in newer MacOS versions.
Next, select and drag the LRTimelapse Symbol to the right, into the “Applications” folder (“Drag LRTimelapse 3 icon here!”).
Now go ahead and start up LRTimelapse and check if the symbols for “ExifTool” and “ffmpeg” on the upper righthand side are displayed in green. This means that everything has been correctly installed.
Using the standard workflow as an example, I’ll go on to explain the basics of LRTimelapse straightaway.
The LRTimelapse Importer
Under File | Import you can start the LRTimelapse importer from within LRTimelapse. Using this you can import your sequence directly from the memory card. This is then appropriate if you have not yet manually or with the Lightroom import function had the sequence copied to your hard drive.
The LRTimelapse importer is an option that offers several useful functions, such as automatically naming sequences in chronological order, converting into DNG format, and automatically initializing the sequence immediately after it has been imported. Furthermore, it creates the necessary preview images right at the time of import.
Using the LRTimelapse importer is of course completely optional. If you already have the sequence(s) on your hard drive, you won’t need it at all, naturally. For me, it has always proved useful in practice because it simplifies and speeds up the import and sorting of large amounts of data.
In the following descriptions of the workflows, I’m assuming that you already have your sequence saved to the hard drive. To begin working with the sequence, it doesn’t matter whether you have used the LRTimelapse importer, or have imported it through Lightroom or copied it by using the explorer/finder. For its part, loading a sequence is always carried out by going to the file tree at the bottom left of the LRTimelapse user interface.
LRTimelapse’s User Interface
LRTimelapse offers a number of different workflows for different editing situations. The workflows are housed under different tabs, and only the relevant buttons are displayed for you to select from at any given time. These are organized in a row to be read off from left to right. A succinct explanation of each one is displayed when you briefly hover over it with the mouse.
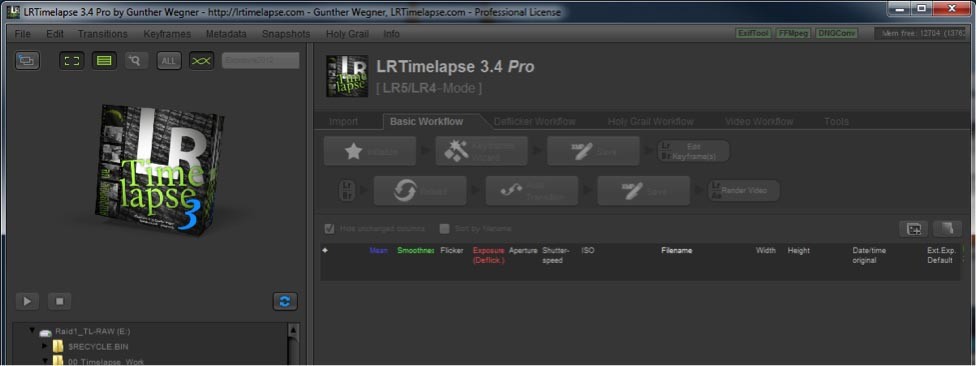
On the bottom lefthand side of the interface, you’ll see your file tree. Navigate to the folder with your time lapse sequence. If you have done everything correctly, as soon as you have chosen the folder, LRTimelapse will begin to read through the images’ XMP metadata in a table on the righthand side. Generally this proceeds very rapidly.
Afterwards, the software will import essential Exif data – including exposure time, aperture value, and ISO, as well as the dimensions and the recording date – from these files. In a third round of operations, the program then loads a preview for the sequence in the background. The one-time generation of this preview is arranged so that the sequence will load more quickly upon subsequent openings.
If you wish, you can wait until the previews have completely loaded. While they load, you can observe how, to the left of the preview, a blue line shows its progress. As soon as this has been drawn to span the area from left to right completely, you’ll be able to click on the “Play” button underneath the preview, and get a first impression of your freshly made time-lapse sequence.
If you become impatient with the process, you can even start editing before the preview has finished loading.
In the process of loading the sequence, LRTimelapse checks if these contain metadata. In the case of an as yet unedited sequence without assigned XMP metadata (meaning fresh from the camera), the “Exposure” column in the table will remain empty.
This means that your images do not yet have any assigned XMP data, or that they have incorrectly initialized XMP data. This Metadata will now be generated during the initialization step.
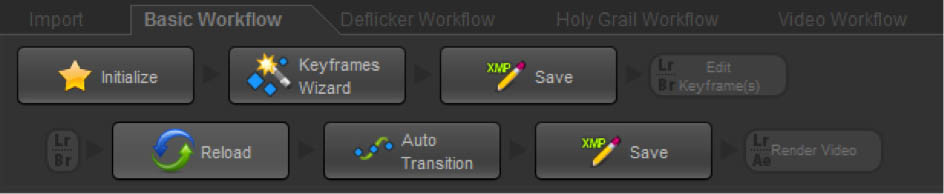
Ensure that the “Basic workflow” is activated. We will now go through this in order from left to right.
The Basic Workflow
1. Initialize
First off, click on Initialize. You should now see, in the righthand side of the table, how the value 0.000 has been entered into the column for “Exposure.” In the background all other development settings are now being initialized. You can view these by unchecking Hide unchanged columns. There should also now be a yellow line, shown in the middle of the lefthand side of the preview, that shows the values in the column “Exposure 2012” (which is Lightroom’s exposure tool) in graphic form.
You can also carry out this process of initialization on an existing sequence that already has metadata, in order to reset it. This is often advisable for sequences that have not been correctly initialized or have incomplete metadata, as it will pave the way for a clearly defined, new beginning for working with the files from that point forward.
2. Creating keyframes
Now click on the second button, Create keyframes. This automatically produces so-called “keyframes,” which is a labeling system for “key images” that you’d like to edit later on in Lightroom. LRTimelapse will later automatically compute the settings for all other frames that have not been assigned the status of keyframes.
The Create keyframes command will automatically analyze your sequence and place keyframes according to a clever algorithm. The more changes in brightness there are in the sequence, the more there will be different points that need to be edited, and therefore the more keyframes will be created by this process.
Keyframes will be indicated by a blue diamond icon by default (there actually exist a couple of special keyframe-types in different colors, but we’ll get to that later) in the preview and in the left column of the table.
After you’ve clicked Create keyframes, you’ll see the newly assigned keyframes – the number depends on the nature of your sequence.
In order for us to have identical conditions for the purposes of this introduction, I’d like to ask you to work with exactly 3 keyframes for this very first run-through. For this purpose we’ll overwrite the keyframes just created. Go to the Create keyframes (evenly spaced) under the Keyframes menu, and enter a value of 3 into the dialog box. After you’ve clicked OK, you see 3 blue keyframes: one in the beginning, one in the middle, and one at the end of the sequence.
As discussed, normally the Create keyframes command would produce the correct number of keyframes for your particular sequence. If you would like to overwrite that, you can use the Create keyframes (evenly spaced) command, as shown here, or you can set up and delete keyframes manually by clicking on the diamond symbols to the far left of the table.
3. Save
Next, click on Save to store you XMP metadata, now thoroughly and correctly initialized. Even the cropping will have already been automatically set to the aspect ratio of 16:9, since that’s the format that the resultant video should generally have (advanced users can turn off this feature in the LRTimelapse settings).
4. Editing keyframes in Lightroom
Now switch over to Lightroom and navigate to the folder with your sequence. For the case that it’s not yet included in your Lightroom catalog, you’ll have to import it now:
Choose Import from the Library module and ensure that Add is selected in the upper area of the import dialog box; this will now add the already existing sequence to the Lightroom catalog (and not copy it!).
During the import process, the values from the XMP files that you have just initialized will also be automatically loaded, so you won’t have to do this in a separate step.
In all other cases (for sequences not yet in Lightroom), you’ll have to alert Lightroom to the changes to the metadata when you switch over to it from LRTimelapse.
To load the metadata in Lightroom, enter the grid view (G), select all (Ctrl+A), and import them by right-clicking and choosing Metadata → Read metadata from files. Please take note that, in so doing, any previous edits made to the sequence in Lightroom will be lost.
You’ll soon establish that the aspect ratio of the sequence has been changed to 16:9 and, in addition, the first frame of the sequence will now be signified with a star. This serves as an indicator of its status as a keyframe.
As I have already mentioned, we want to exclusively focus on the keyframes at this point; LRTimelapse will take care of everything else later. That means we can go ahead and hide all remaining pictures from view, which can be done with the use of a customized filter.
In order to view only the keyframes, go to the filter list in the lower righthand side of the Lightroom Window and choose “LRT-All keyframes.” This will then display only the images marked with a star.
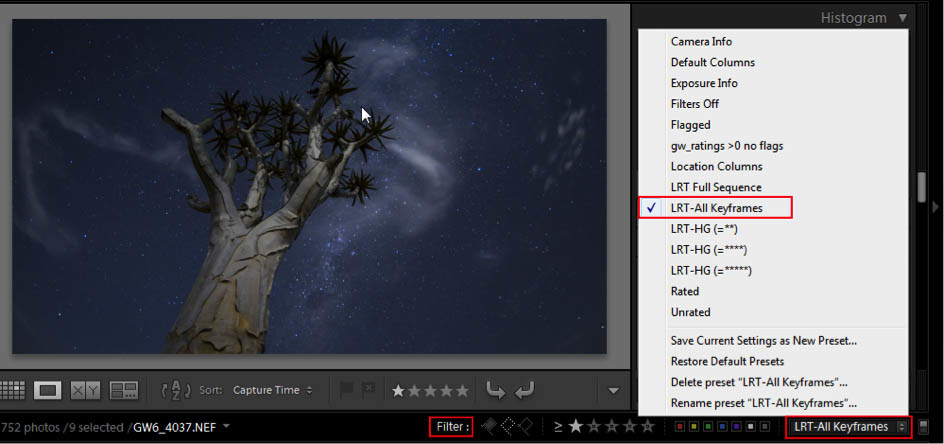
Now you can edit these keyframes.
Please edit the very first keyframe, which is located all the way to the left in the filmstrip at the bottom.
After editing, go ahead and copy the development settings for that photo to the clipboard, which is done by selecting Copy settings from the Settings menu or, alternatively, by pressing Ctrl+Shift+C.
Proceed to the next keyframe. Enter the copied settings values here by selecting Paste settings or by pressing Ctrl+Shift+V.
Based on the development settings just pasted, you’ll be able to modify the editing from keyframe to keyframe. You can, for example, adjust the brightness and the white balance. Go ahead and overdo it a little for the purposes of your first run-through by altering the colors with the white balance, or by desaturating the image to create a black-and-white shot (use the saturation control for this, and not the black-and-white tab next to HSL).
Now you’ll want to copy the settings of this second keyframe by pressing Ctrl+Shift+C and paste them into the last keyframe image using Ctrl+Shift+V.
If you initially shot your sequence during a time period that bridged twilight, and the last picture taken by the camera in manual (M) mode now seems much too dark, just lighten it now using the exposure and shadows controls.
Finished? Awesome! Now we’d want to have the development parameters for all of the successive pictures in between the keyframes be calculated. In order to be able to access the development parameters, we need to have them written to the XMP metadata once again. Luckily, there is a command under the Metadata menu for just this purpose: Save Metadata to Files, which can also be called up with the keyboard shortcut Ctrl+S.
Important
Please make sure that you’re always in the Grid view (G) and that you have selected all the images (Ctrl+A) to which the operation will apply before you Load metadata or Save metadata (Ctrl+S). If you do this from the Develop-Module instead, Lightroom might not consider all images!
In this case it’s enough to write the metadata for the modified keyframes, meaning you will not have to remove the filter.
Now switch over to LRTimelapse again.
5. Back to LRTimelapse to reload
Now it’s time to proceed with the second row of the LRTimelapse workflow.
After you have saved the metadata of the photos that you’ve edited in Lightroom, you’ll need to update these values in LRTimelapse. To do so, simply click on Reload and the development settings will be loaded anew.
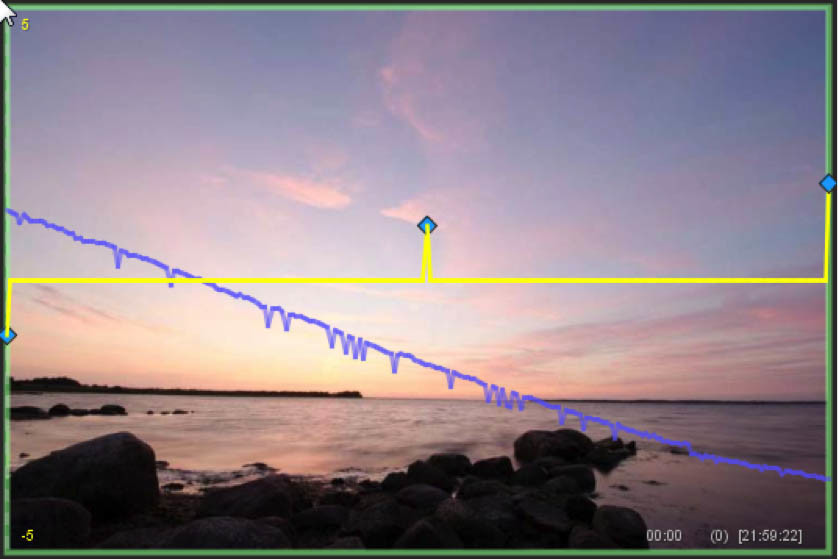
You’ll see from the table that the keyframe’s parameters have changed. If you have altered the exposure slider, the yellow curve visible in the preview will also be different now. You can select the parameter that’s superimposed as a curve from the drop-down menu in the upper righthand corner of the preview.
At this point, only the edited keyframes reflect your modifications; the intermediary images have not yet been touched. We’ll do that now, using the auto transition function.
Basic Workflow for time lapse processing with LRTimelapse: Part II
You are now ready to get to the second part of the exclusive tutorial dedicated to time-lapse processing with LRTimelapse, which will help you through the following steps:
- Auto Transition and Save
- Load the complete sequence in Lightroom
- Render the sequence with the LRT Export Plugin
- Render intermediary video sequence
Any questions? Join the LRTimelapse Forum!
Should you have any questions regarding the LRTimelapse workflow and deflickering process, don’t waste time and join our dedicated forum provided to you free of charge by the Time Lapse Network!
This is one chapter about the basic editing of Time Lapse Sequences from Gunther Wegner’s Ebook Time Lapse Shooting and Processing. If you are interested in Time Lapse Photography and editing, please consider buying the EBook, since it will teach you all the secrets from shooting until the more advanced techniques like deflickering your sequences and achieving the holy grail of time lapse: perfect transitions from day to night!
For the sake of clarity, links towards Gunther’s LRTimelapse website are affiliate ones. Please note that by purchasing a license or the E-Book, you support the Time Lapse Network… so thank you for doing that!
